Showing posts with label Wordpress. Show all posts

Friday, 10 November 2017

How to change AddThis Follow button settings for a gadget on blog or website

This article shows how to change the accounts presented in an AddThis Follow gadget which has already been set up on a Wordpress-based website.

(Note:   this is only relevant for Wordpress.org users.   Wordpress.com users do not have the same freedom to add or configure plug-ins.)


The AddThis plug-ins for Wordpress provide several functions.  One is a Follow gadget, which lets you offer links to your account on other platforms (eg on Twitter, Facebook and Instragram), so that people who are interested can subscribe to you there, and get updates from you even if they don't visit your blog or website regularly). 

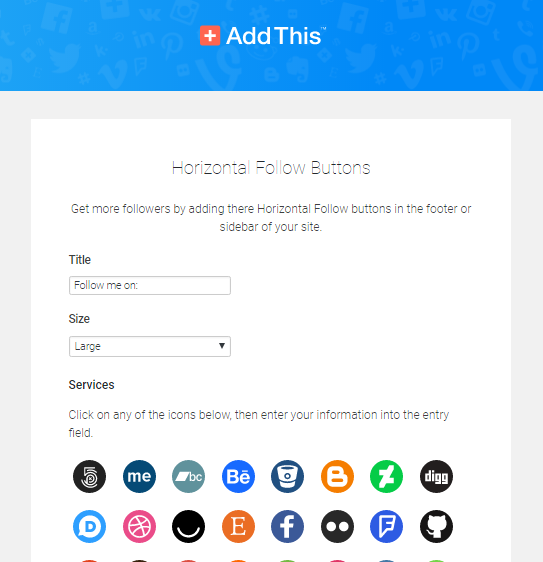
When you install and activate this plugin, there is a screen where you can choose which other platforms to show, and say what your address on those platforms is.   

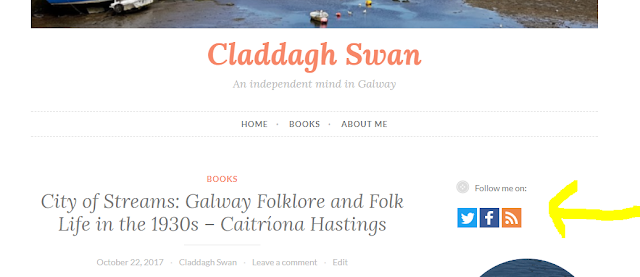
After you have set up the plug-in, then you an add the AddThis Follow widget to your site,   This gadget displays an icon for each tool which you selected, and each one link to the account that you provided.    How exactly it looks depends on the options you choose, but one possibility (Horizontal Follow) is like this:


But - how do you change these settings after the gadget has been added? 


For most widgets, to change their settings you just:
  • Choose Appearance > Widgets from the left hand menu
  • Find the widget in the list of ones that have been installed
  • Click the down-arrow beside the name, to reveal the options.

And initially, AddThis-Follow looks much the same.  Rather than giving the detailed options immediately, it says

To edit the options for your AddThis tools, please go to the plugin's settings

Which sounds fair enough - there were a lot of values displayed on the page where you selected which social media platforms to include and how to connected them to your blog.


So you click the link, and get taken to a page - example below- which looks nothing like the one where you chose the services to display in the widget.   Even when you scroll down, nothing looks familiar, or even gives any clues about how to update the linked social networking accounts:


How to change the accounts offered by the AddThis Follow widget after it has been added


Don't start with the Appearance > Widgets  menu item.

Instead:
  • Choose with Plugins >  Installed plugins  
  • Find   Follow Buttons by AddThis in the list.
  • Click Settings
  • In the list of gadgets that is displayed, beside the type of Follow button you used (horitzontal or vertical), click the Settings button.    [Yes, that is two Settings clicks in a row.]

This opens up the familiar screen where you can choose social media services by clicking on their icon, and entering your name on that service in the field at the bottom of the page.


Job Done!    

You can now edit the social media accounts linked to your blog  - both correcting errors in the original setup, or adding new accounts which have been added since then.


What this means

Aach AddThis widget (eg AddThis-Follow, AddThis-Inline, etc) has the same settings each time it is used on your site.   So, provided your theme supports having gadgets in multiple places, you can have the Follow-Me gadget several places  (eg in your sidebar and underneath your posts) - always looking the same and linking tothe same social-media accounts.



Related Articles:

There are no related articles for this topic.

Monday, 25 September 2017

How to put posts into pages in Wordpress - without using a plug-in

This article shows how to set up your blog made with Wordpress so that that (it looks like) your posts are on separate web-pages, without needing to install any plugin.

(For this task, the answers for Wordpress.org and Wordpress.com are so very similar that they have been combined into the one article.)


Wordpress, like most blogging platforms, is basically made up of Posts, Pages and Widgets (aka gadgets).

People who are building blogs often want to "put posts into pages" ie to have a page which shows a subset of their posts, based on the category.  

The standard, but unsatisfactory, answer is
"Sorry, that's not how Wordpress works.   Static pages are used for reference information that doesn't change often, which you don't want to be part of your regular post-feed, but which you do want users to have easy access to."

Luckily it's easy to set up your blog so that it looks like your posts are on different pages by following three simple steps.   This is an out-of-the box function and no plug-in's are required.


Follow these steps to put your posts into pages


1   Add Categories to your posts

Edit each post, and add one or more Categories to it.  

It's your choice whether to add a Category to all posts, or just the ones that you want to show up on specific page-look-alike ones.


2 Make a menu

Skip this step if your blog already has a primary menu.   But if it doesn't:

Wordpress.org users:

  • In your Wordpress dashboard, go to Appearance > Menus
  • Enter a name for the menu.   fyi, this name isn't displayed, it's just used to help you know which menu is which,  I usually call it   topMenu
  • Under Menu settings > Display Location, click   Primary menu
  • Click the Save Menu button

Wordpress.com users

  • In your Wordpress dashboard, go to  Customize > Menus > Add a menu
  • Enter a name for the menu.   fyi, this name isn't displayed, it's just used to help you know which menu is which,  I usually call it   topMenu
  • Click Create Menu
  • Under Display Location, click   Primary menu
  • Click the Save and Publish button

3   Add each Category that you want a page for to the menu

In the Wordpress dashboard:
  • Wordpress.org users, choose  Appearance > Menus
  • Wordpress.com users, choose Customize > Menus

Choose the menu which you want people to use to a page of posts  (mostly this will be the primary menu - but in theory you could use any one).

Wordpress.com users - you also need to click Add Item here, to open the next screen.

In the screen that opens, there are four types of items that you can add to a menu.   Click on the drop-down arrow beside Categories to see the current list of category values which you have added.

Select the Category-value(s) that you want to have pages for, and click the Add to Menu button.


This will add the selected category values to the "Menu Structure" section.  

Drag-and-drop them up and down the list to change the order of the items on the menu.

When you are happy with the order, click the Save Menu or the Save and Publish button.


3   Optional:  Deal with the home-page

By default, Wordpress blogs show posts on the home page, as well as on the "Category pages" for the categories you have assigned to them.

You can stop this by choosing
  • Wordpress.org users:     Appearance > Customize > Static front page   
  • Wordpress.com:    Customize  > Static front page   
and clicking the Static Page radio button.


Next, under the Front Page drop-down box, either
  • Choose one of your existing Pages or
  • Use the Add New link to create a new Page  (you can edit the contents later).

And under Post Page, either
  • Choose one of your existing Pages or
  • Use the Add New link to create a new Page
Note that this step is optional:   if you do it, you also need to edit your Menu (see step 2 above),  and add the selected Page to your menu.    If  you don't do this, then you need to have set up some other method for people visiting your blog to get to the posts.


Click Save and Publish    (at the top of the sidebar), to make these changes take effect.


Job Done

It really is that simple.  Your readers can now click on the "pages" in your blog from your menu, and see a list of posts for the Page that they chose.

Even better, if some posts relate to more than one topic, they show up on all of the relevant pages.  


Related Articles

Coming soon.

Sunday, 5 January 2014

Best HTACCESS File for Wordpress Website

HTACCESS is one of the most important files of a website. If its coded correctly then it can improve the load time of your website to the best possible limit. But if its coded incorrectly then you will keep messing with other PHP and HTML code, and your website speed will not improve. Once you have coded HTACCESS correctly you will also make it better according to SEO point of view.


Best HTACCESS for Wordpress Website


However this is a blogger blog but i am providing tips for a wordpress website. just because this thing will help a number of people struggling with their Wordpress website. If you are aware of HTACCESS file then you must know its importance as well.
Below we will provide some coding for HTACCESS and also explain its use.

1) Add Expires : It will add a expiry tag to each type of file that the website loads while loading it in the browser of a user. If the same user access the same website again or go through the other pages of your website then the same content like images, logo, scripts, style sheets will not load again if expiry tags are added to it. Thus it improves the loading time of a website.

<IfModule mod_rewrite.c>
ExpiresActive On
# Default directive
ExpiresDefault "access plus 1 month"
# My favicon
ExpiresByType image/x-icon "access plus 1 year"
# Images
ExpiresByType image/gif "access plus 1 month"
ExpiresByType image/png "access plus 1 month"
ExpiresByType image/jpg "access plus 1 month"
ExpiresByType image/jpeg "access plus 1 month"
# CSS
ExpiresByType text/css "access plus 1 month"
ExpiresByType text/html "access plus 5 minute"
</IfModule>

2)  Pagespeed Module for Apache Server Based Sites

<IfModule pagespeed_module>
    ModPagespeed on
    # using commands,filters etc
</IfModule>

3) ETag : Entity Tag tells if the content available in browser is same as file on the server. Thus it saves loading time of same content again. So it should be handled properly.

Header unset ETag
FileETag None

4) DEFLATE : If you know the zip files then you will understand it. Using DEFLATE make your website server send the zip version of files from server to browser which reduces the loading time a lot.

<IfModule mod_deflate.c>
# Insert filters
AddOutputFilterByType DEFLATE text/plain
AddOutputFilterByType DEFLATE text/html
AddOutputFilterByType DEFLATE text/xml
AddOutputFilterByType DEFLATE text/css
AddOutputFilterByType DEFLATE application/xml
AddOutputFilterByType DEFLATE application/xhtml+xml
AddOutputFilterByType DEFLATE application/rss+xml
AddOutputFilterByType DEFLATE application/javascript
AddOutputFilterByType DEFLATE application/x-javascript
AddOutputFilterByType DEFLATE application/x-httpd-php
AddOutputFilterByType DEFLATE application/x-httpd-fastphp
AddOutputFilterByType DEFLATE image/svg+xml

# Drop problematic browsers
BrowserMatch ^Mozilla/4 gzip-only-text/html
BrowserMatch ^Mozilla/4\.0[678] no-gzip
BrowserMatch \bMSI[E] !no-gzip !gzip-only-text/html

# Make sure proxies don't deliver the wrong content
Header append Vary User-Agent env=!dont-vary

<FilesMatch ".(js|css|html|htm|php|xml)$">
SetOutputFilter DEFLATE
</FilesMatch>
</IfModule>

5) Multiple Connections: This will help your website in creating multiple connection with browser at the same time. Thus your wordpress website will improve.

<ifModule mod_headers.c>
 Header set Connection keep-alive
 <FilesMatch "\.(js|css|xml|gz)$">
    Header append Vary: Accept-Encoding
 </FilesMatch>
</ifModule>

Note: Before implementing these codes in your wordpress website HTACCESS code, make you that you have taken backup of your original HTACCESS. It will help you if anything goes wrong. I will suggest you to implement these changes one by one. Don't add all of the above codes at onces. Instead apply them one by one and also keep checking if your website is working or not. If anything goes wrong then revert the changes and add the next code.

Usually i use GTMETRIX to check performance of my websites. You can also use it as its a free tool. Check you website rating using it before applying the changes and then after applying the changes.

You are most welcome to add your comments about HTACCESS. Any suggestions are most welcome.