Showing posts with label AddThis. Show all posts

Friday, 10 November 2017

How to change AddThis Follow button settings for a gadget on blog or website

This article shows how to change the accounts presented in an AddThis Follow gadget which has already been set up on a Wordpress-based website.

(Note:   this is only relevant for Wordpress.org users.   Wordpress.com users do not have the same freedom to add or configure plug-ins.)


The AddThis plug-ins for Wordpress provide several functions.  One is a Follow gadget, which lets you offer links to your account on other platforms (eg on Twitter, Facebook and Instragram), so that people who are interested can subscribe to you there, and get updates from you even if they don't visit your blog or website regularly). 

When you install and activate this plugin, there is a screen where you can choose which other platforms to show, and say what your address on those platforms is.   

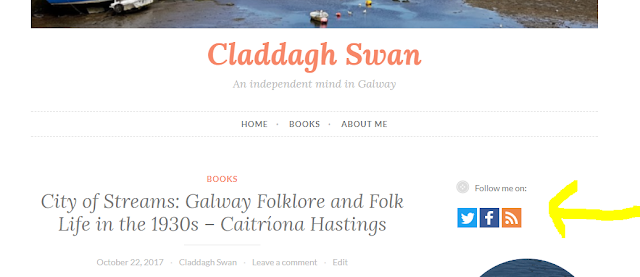
After you have set up the plug-in, then you an add the AddThis Follow widget to your site,   This gadget displays an icon for each tool which you selected, and each one link to the account that you provided.    How exactly it looks depends on the options you choose, but one possibility (Horizontal Follow) is like this:


But - how do you change these settings after the gadget has been added? 


For most widgets, to change their settings you just:
  • Choose Appearance > Widgets from the left hand menu
  • Find the widget in the list of ones that have been installed
  • Click the down-arrow beside the name, to reveal the options.

And initially, AddThis-Follow looks much the same.  Rather than giving the detailed options immediately, it says

To edit the options for your AddThis tools, please go to the plugin's settings

Which sounds fair enough - there were a lot of values displayed on the page where you selected which social media platforms to include and how to connected them to your blog.


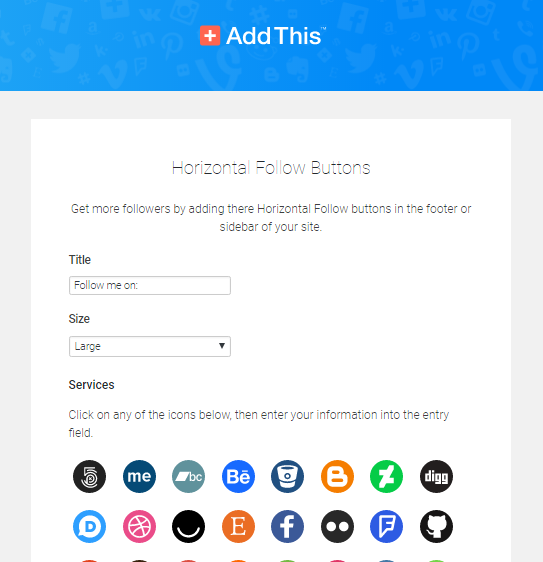
So you click the link, and get taken to a page - example below- which looks nothing like the one where you chose the services to display in the widget.   Even when you scroll down, nothing looks familiar, or even gives any clues about how to update the linked social networking accounts:


How to change the accounts offered by the AddThis Follow widget after it has been added


Don't start with the Appearance > Widgets  menu item.

Instead:
  • Choose with Plugins >  Installed plugins  
  • Find   Follow Buttons by AddThis in the list.
  • Click Settings
  • In the list of gadgets that is displayed, beside the type of Follow button you used (horitzontal or vertical), click the Settings button.    [Yes, that is two Settings clicks in a row.]

This opens up the familiar screen where you can choose social media services by clicking on their icon, and entering your name on that service in the field at the bottom of the page.


Job Done!    

You can now edit the social media accounts linked to your blog  - both correcting errors in the original setup, or adding new accounts which have been added since then.


What this means

Aach AddThis widget (eg AddThis-Follow, AddThis-Inline, etc) has the same settings each time it is used on your site.   So, provided your theme supports having gadgets in multiple places, you can have the Follow-Me gadget several places  (eg in your sidebar and underneath your posts) - always looking the same and linking tothe same social-media accounts.



Related Articles:

There are no related articles for this topic.

Tuesday, 29 September 2015

How to centre-align the sharing-icons from AddThis in Blogger

This article shows how to get and then centre-align the row of sharing items that you can get from AddThis (and it's likely that a similar technique applies to sharing buttons from other services like ShareThis, too).


If you think that Blogger's own social sharing buttons a just a bit too small and difficult position, then you may decide to use a service like AddThis to generate buttons that are more elegant all round.

Signing up with AddThis is easy: just log in to your Blogger account, and in a separate tab open up AddThis.com. Choose Create Account, and then Continue with Google. This links your Google account and your AddThis account, and is the easiest approach - but there are other options too, like creating your account with your Facebook or Twitter accounts, or even just signing up the old fashioned way with your email address.

Once you have signed up and chosen a plan (personally I just the free "Basic" plan), you need to actually install the AddThis buttons on your site. To do this:
  • Select one or more sets of sharing buttons (from the options available to your account type),
  • Choose the settings which apply to that set of buttons
  • Choose Activate (button in the bottom right corner of the setting screen), and
  • Install the code that AddThis gave you into your blog.

Installing the code that AddThis gave you is pretty much like installing any other piece of code.   Typically the code you have to install has two parts:

For the piece that says:
Step 1: Add the following code to the <body> of your website.
Search for "<body"  (note:  no closing angle-bracket because some templates have extra instructions in there), and then put the code from AddThis after the angle bracket that goes with the <body


For the piece that says:
Step 2: Paste this code into whichever page you would like this tool to show up.
Find the location in your template that you would like the gadget (eg an HTM gadget, or inside the post statement itself - read more about the options), and copy and paste the relevant code from AddThis.


But it's not in the right place.

If you install the code as is from AddThis, you will find that the row of sharing buttons is pretty tightly linked up with the rest of the page, and left-aligned.   Fortunately this is easy to change.


How to centre (or right align) rows of buttons from AddThis 

To put the set of sharing buttons from AddThis at the middle of the page, you need to surround the 2nd piece of code from AddThis with another Div statement, like the one in bold below:
<div style = 'width:100%; text-align: center; margin-bottom:3em; margin-top:2em;'><!-- Go to www.addthis.com/dashboard to customize your tools -->
<div class="addthis_sharing_toolbox"></div>
</div>
The exact details to use depend on how exactly you want to set up your sharing-bar form AddThis.  I wanted it to be centre-aligned on one of my sites, with some extra white space above and below, so I used these commands:

  • width:100%  -  says to use all of the page-width in deciding where to put the sharing bar  (by detfault, it would just use the width of the sharing bar itself
  • text-align: centre   -   means that he bar will be put in the middle
  • margin-bottom and margin-top   put some extra space above and below the gadget, so it sticks out more-so.


But you may use a different approach, depending on what your blog is trying to achieve.

What your readers see

Visitors using a web-browsers

Will see your AddThis buttons, as you defined them

Readers who subscribe to your blog's RSS feed

Will not see your blog's AddThis sharing buttons, unless they happen to click through from their feed-reader to your blog.

Readers who follow-by-email 

Will not see your standard social sharing buttons at all, unless they visit your site.   (AddThis does have some email newsletter buttons, but these don't automatically go into emails generated from Blogger).


Is it worth it?

For what it's worth, I recently made the change from custom sharing buttons that I'd made myself to classier looking ones from AddThis, and saw quite a jump (50% or more) in the number of social shares, across all my sites.

YMMY, of course.


Related Articles

Installing 3rd party code into Blogger

Using Div statements to control layout