Monday, 20 January 2014

Putting a picture on your blog as a Gadget

You can put a picture anywhere in your Blogger blog that you can insert a gadget - and you can make it link to a post in your blog or to any other website.

The Image gadget

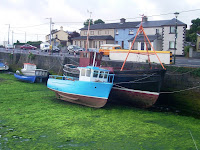
Dry dock in Claddagh Basin
A very simple way to put a picture into your blog is to use an Image gadget (previously called a Picture gadget).

This is a tool that Blogger provides to make is easy to add a picture that shows up on all screen and is linked to somewhere.

Often gadgets (sometimes called widgets or page elements) are put on the sidebar - but in many blogger templates they can go in other places too (header, footer, etc).

Follow these steps to add a picture gadget in Blogger

1  Make sure you know where the original picture is and that you have copyright permission to use it.

2  Copy the location (URL or file system full path-name) of the picture - and remember whether it's on your computer, or on the internet.
(This article tells you how to find the URL of a picture that's already stored in Google Album Archive. )

3  In Blogger, follow the usual Add a Gadget procedure, and choose the Image gadget from the list of options (you may have to scroll down to find it in the list).

4  In the Configure-Image box, enter the options you want for your picture.   These include:
  • The title for the Gadget,
  • The caption for the picture
    (the small words that go underneath it, usually explaining it, or where it came from),
  • What should happen when a reader clicks the picture - put this into the Link field
  • Where to find the picture
    (ie the file-location that you copied in step 2)
  • Whether to re-size (ie shrink) the picture to fix the space in the sidebar in your current template.

5 Press Save.

6  If necessary, drag-and-drop the new gadget to the place where you want the picture to go, and press Save.


What your visitors see

People who visit your blog in a web-browser, will see the picture, in the place where you put the gadget.  However pictures are not supported gadgets for dynamic view templates, so it won't be see if you use one of these.

Also, people who see your blog through an RSS reader, or by receiving emailed updates don't see any gadgets, so they will not see the picture.  

If you entered a value for Link, your visitor's browser leaves your blog and goes to the Link location:  with the Picture gadget, then there is no way to make this open a new window.   If you want to do so, then use an HTML gadget instead, get the code for the picture, and put target = "_blank"   into it:, so the code looks something like: 
<a href="YOUR LINK" imageanchor="1" style="margin-left: 1em; margin-right: 1em;" target = "_blank"><img border="0" src="YOUR PICTURE LOCATION" /></a>


Related Articles

Options for putting pictures into your blog

Copyright, blogs and bloggers

Picasa and Blogger - an overview

Getting the HTML to add a picture to your blog

Finding a picture's URL in Google Album Archive

Finding the URL of a picture stored in Flickr

Showing a PowerPoint presentation in your blog

Why RSS / Subscribe to Posts is important for bloggers

Following a blog by email

Add a Cool Style to Blogger Threaded/Nested Comments

If you need a fresh style to the threaded comments of a standard Blogger template, here's a simple CSS that will help you to apply a different background, make your avatars rounded, add a border with rounded corners and a triangle which is actually an HTML entity to get that speech bubble look on your comments.

You can see a demo here.

To have this style in your comments, all you need to do is to paste the below code inside the CSS part of the template, which is between the <b:skin> and </b:skin> tags.

Styling Simple Nested Comments with CSS

Step 1. From the Blogger Dashboard, go to "Template" and press the "Edit HTML" button


Step 2. Click anywhere inside the code area and press the CTRL + F keys to open the search box:


Step 3. Paste or type the following tag inside the search box and hit Enter to find it
]]></b:skin>
Step 4. Just above ]]></b:skin> add this CSS:
.comments .comment-block {
background: #F9F9F9;
color: #555;
box-shadow: 0 4px 10px #EEEEEE;
position: relative;
margin-top: 10px;
margin-left: 60px;
padding: 10px;
border: 4px solid #EEEEEE !important;
border-radius:10px;
font: 1.190em/1.2 Cambria,Georgia,sans-serif;
}
.comment-thread li .comment-block:before {
position: absolute;
display: block;
left: -26px;
color: #EEEEEE;
content: "\25C4";
font-size: 30px;
}
.comments .avatar-image-container {
width: 60px;
height: 60px;
max-height: 60px;
margin:0px 0px 0 -28px;
padding: 0px;
border: 7px solid #EEEEEE;
border-radius:60px;
}
.comments .avatar-image-container img {
overflow:hidden;
width: 60px;
height: 60px;
max-width: 60px;
border:0 !important;
border-radius:60px;
}
.comments .comment-thread.inline-thread {
background: none;
}
.comments .continue {
border-top: 0px solid transparent;
}
.comments .comments-content .datetime {
float: right;
font-size: 11px;
}
.comments .comments-content .user a{
font-size: 15px;
color: #498EC9;
}
.comments .comments-content .datetime a:hover{
color: #777;
text-decoration: none;
}
.comments .comments-content .comment:first-child {
padding-top: 0px;
}
.comments .comments-content .comment {
margin-bottom: 0px;
padding-bottom: 0px;
}
.comments .continue a {
padding: 0px;
}
.comments .comments-content .icon.blog-author {
background-image: none;
}

How to Change Blogger Threaded Comments Background, Border and Colors

  • replace the #F9F9F9 value to change the background color of the comments;
  • #555 to change the text comments color;
  • #EEEEEE to change the color of the shadow around comments;
  • 4px solid #EEEEEE to change the border width (4px), style (solid) and color (#EEEEEE) around comments;
  • 1.190em to change the comments font size;
  • to change the arrow color, replace the #EEEEEE value from color: #EEEEEE;
  • to change the border width (7px), style (solid) and color (#EEEEEE) around avatars, modify this part: 7px solid #EEEEEE;
  • to change the avatars size and roundness, change the 60px value;
Here is a tool from that may help to pick your favorite color: Color Code Generator

Step 5. Finally, click on the "Save template" button... and you're done!

YouTube Monetization Disabled

YouTube Account Suspended
Is your YouTube Monetization Disabled? then, it may be due to any of the three reasons delineated below.

Monetization Reviews

If you do not own the rights for the video that you have just submitted for monetization review, then your account might be next in line for disabled monetization. If you repeatedly submit such videos then you are bound to get banned from monetization. You will never get back the ability to monetize your videos on YouTube using the same Adsense account.

Banned Adsense Account

If your Adsense account is banned due to invalid click activity or any such thing then you will lose your ability to monetize YouTube video using that account.

Community Guidelines

If you receive multiple Community Guidelines strikes, copyright strikes and/or worldwide Content ID blocks, you may lose the ability to monetise your videos on all the accounts linked to your AdSense account. All of your accounts must be in good standing to regain monetisation after six months. Note that account monetisation may still be disabled if you delete the blocked videos.
If you have any doubts regarding this, then please feel free to leave a comment below.

The Sky of Verdun 3D - dogfight in HTML5

Came across this seemingly fun little game over here, too bad I don't have a Occulus Rift (yet):


Check their page for the Win32 and browser server/client download.

Friday, 17 January 2014

Google use Google-Sites, so we should too!

This QuickTip explains why I now feel happier about using elements from Google Sites in my blogs.


What is Google Sites, and why would a Blogger use it

Long ago (back in the late 2000's) there was a product called Google Pages, which people could use to make their own simple websites. It wasn't the greatest product that Google ever made (or purchased), and eventually it was retired, with websites made with Pages transferred over to the newer Google Sites.

Sites always seemed a bit clunky. It doesn't seem to have a huge number of users.   And there are vastly better products for building more-complex websites, and for building simple ones (eg using Blogger to make a "real" website).

Now, I did use a Sites filing cabinet as the document-store for one of my sites that makes lyrics of certain public domain songs available in PowerPoint format. I chose it before Google Drive had been released, and when Docs was not nearly as good as it is now. And SEO does matter for this blog, so I came to appreciate that the link to a file in sites includes the file-name.

But I've always had a nagging sense that one day Sites would be retired too, and I'd have to move my files and edit all my posts to re-set the links.


Why won't Google retire Google Sites

Despite my previous misgivings, I'm now feeling a lot more relaxed about Google Sites.  

Why?   Well I don't have a crystal ball.   But this recent post from the Google Testing blog talks about how they are into "dogfooding" and that Sites is one of the tools they do this with, to " host team pages, engineering docs and more"

Just to explain, "dogfooding" is corporate-jargon for using your own products. As in "eating your own dogfood".  It's sometimes called "drinking your own chapmpagne" in companies that see themselves as a bit more refined, or "eating your own cooking".

Google's post is telling us that they are using Sites for building tools that they use in their own work. Most likely, they have a website built in Sites, which manages their plans for future Blogger development, and available only to people inside the company and working on the Blogger project.

So that makes me feel reassured that most likely:
  1. Sites won't be canned any time soon, or
  2. If Sites is turned off, Google will have a replacement tool which will provide the same (and better) features, and they will convert items now built in Sites to this better tool.

Phew!

Maybe it's time to review my file-hosting approach again, or to re-visit Sites and look at their FAQs, home-page and support-community, to see what other Sites tools I might find useful.

How have you used Sites in conjunction with your blog?


Related Articles:

File-hosting options: places to store files that you share from your blog

Why SEO doesn't matter for lots of bloggers