I have to admit that we are a bit slow on reporting the news on FOSS gaming projects with we actually host ourselves via the freegamedev.net forums. Valyria Tear is sadly no exception, and their new 0.6.0 release has been out a few days already. Sorry to all whom this may concern.
For those not in the loop, Valyria Tear is based on the engine of Hero of Allacrost and aims to be an all FOSS jRPG. To give you a better idea of the game-play, here is a (slightly older) cool video of it done by some Linux enthusiasts:
(Thanks also to Rootgamer who reminded me of this news).
If you like the new release, give them some praise on our forums!

Monday, 30 September 2013
Saturday, 28 September 2013
How to edit a picture in Picasa Web Albums or Google+ Photos
This article is about how to edit pictures in Picasa web albums, and how to use Picasa-destop to edit pictures in your Google+ Photos.
 Picasa-web-albums is a on-line photo storage and management tool, now owned by Google. It is the on-line version of Picasa, a desktop-tool. (Learn more about PWA and Picasa here.).
Google would ideally like everyone to use Google+ Photos.
But there are many people who store pictures in albums that are not associated with their personal Google+ accounts: these may be for businesses, schools, clubs, etc.
So it is likely PWA will continue to exist for a good while yet. And I am sure that Google appreciate this: they have made a number of changes to Picasa-web-albums to make it work better both with Google+ and without it.
(See here for what do to if you are automatically re-directed from PWA to Google + Photos)
Navigate to the photo that you want to edit.
(Make sure you're looking just at that photo, not at the album it is in - this can be confusing in cases when the photo is also the album cover.)
Choose Edit in Google+ from the Actions drop-down menu.
This opens a new window or tab.
If you are not signed in with your Google + account, you will be invited to join.
If necessary, sign-up for Google+, or sign in with the correct account, and start again.
Now, you will be looking at the photo in the Google+ Photos picture view. From here you can do simple edits:
To do more changes, choose Edit (yes, you need to choose it a 2nd time) from the top menu.
If you are not using Google Chrome, then you will get a message saying that the Google+ photo editor only works with Chrome, and giving you a link to download it. If necessary, switch to Chrome and start again.
Wait while the photo editing tools are loaded (this does take a while, perhaps even a minute or two).
Once loading is finished, the current Google + Photo editor functions are available from the right-hand bar, like this:

At the moment these are:
When you are happy with your photo, click the Finished Editing tick box at the bottom of the right-hand bar, and the changes will be saved (this may take a few moments).
You are left in the open Google+ Photos tab or window, not returned to Picasa-web-albums. When you go back to Picasa-web-albums and refresh the page (F5), the changes that you made in Google+ photos will be shown.
Log in to Picasa-web-albums, using your Google account.
Navigate to the photo that you want to edit. (Make sure you're looking just at that photo, not at the album it is in - this can be confusing in cases when the photo is also the album cover.)
Choose Edit in Picasa from the Actions drop-down menu.
Picasa will load on your computer, and you will be asked to confirm that you do want to edit the selected picture. Choose Edit Image.
From here you have access to all Picasa's standard photo editing tools (including the text tool for adding watermarks).
The photo you are working in is a copy taken from your Picasa-web-albums, it is not the same as the copy of the picture which may already be on your computer. It is stored in a directory of your Picasa-installation called "Online Edits", not in your main My Pictures directory. So if you choose a function like "Back to Library" you are taken to the Online Edits folder inside Picasa-desktop.
From here you can use all of Picasa-desktop's editing features, including straightening, red-eye reduction, text-editing, re-setting the neutral colour. The only exception is the Edit in Creative Kit option: this is still one of the options in Picasa-desktop, but if you use it, it takes a long time to load and then eventually says "Error connecting to Creative Kit... error 500" - and explains that Creative Kit has now been discontinued.
When you are finished editing, to put the edited photo back into the same Picasa-web-album that it came from, with the same file name and URL:

Job Done: your Picasa-desktop-edited photo appears back in your online Picasa-web-albums with the changes that you just made, and any existing links to it (eg from your blog posts) will show the changed version of the picture. And you can put the edited picture into your blog posts or other websites in the usual way.
Stop automatic redirection to Google+ Photos
How to put a picture into a blog-post
Tools for applying copyright protection to your blog
Picasa-web-albums vs Google+ Photos

Google would ideally like everyone to use Google+ Photos.
But there are many people who store pictures in albums that are not associated with their personal Google+ accounts: these may be for businesses, schools, clubs, etc.
So it is likely PWA will continue to exist for a good while yet. And I am sure that Google appreciate this: they have made a number of changes to Picasa-web-albums to make it work better both with Google+ and without it.
Options for editing pictures that are are uploaded to Google
- If you have a Google+ account, then there are two ways of editing photos that you have loaded to Google (it doesn't matter whether you loaded them using Picasa-web or Google+Photos).
Both of these options are described below. Using the Google+ editor (option 1) doesn't need any software installed on your PC. But it's very slow to load, offers you less control, and is currently missing some key features - and it only works if you are using Chrome as your web-browser, not Firefox or Internet Explorer.
- If you don't have a Google+ account, then Google / Blogger only provides only one way to edit photos that you have loaded to it (apart from downloading the photo, editing it on your PC and re-uploading it - which changes the URL you need to use to link to the photo). This is Option 2 below.
Option 1: Using Google + edit a picture in Picasa-web-albums
Log in to Picasa-web-albums, using your Google+ account.(See here for what do to if you are automatically re-directed from PWA to Google + Photos)
Navigate to the photo that you want to edit.
(Make sure you're looking just at that photo, not at the album it is in - this can be confusing in cases when the photo is also the album cover.)
Choose Edit in Google+ from the Actions drop-down menu.
This opens a new window or tab.
If you are not signed in with your Google + account, you will be invited to join.
If necessary, sign-up for Google+, or sign in with the correct account, and start again.
Now, you will be looking at the photo in the Google+ Photos picture view. From here you can do simple edits:
- Crop the photo
- Tag people
- Rotate the photo
To do more changes, choose Edit (yes, you need to choose it a 2nd time) from the top menu.
If you are not using Google Chrome, then you will get a message saying that the Google+ photo editor only works with Chrome, and giving you a link to download it. If necessary, switch to Chrome and start again.
Wait while the photo editing tools are loaded (this does take a while, perhaps even a minute or two).
Once loading is finished, the current Google + Photo editor functions are available from the right-hand bar, like this:

At the moment these are:
- Tune (brightness, contrast, saturation, shadows, warmth)
- Selective Adjustment (lets you specific areas for other options to be applied to)
- Details (sharpness and structure)
- Crop and Rotate
- Black and white
- Centre focus (adjust brightness and blur around the centre)
- Drama
- Frames
- Tilt-shift
- Vintage
- Retrolux.
When you are happy with your photo, click the Finished Editing tick box at the bottom of the right-hand bar, and the changes will be saved (this may take a few moments).
You are left in the open Google+ Photos tab or window, not returned to Picasa-web-albums. When you go back to Picasa-web-albums and refresh the page (F5), the changes that you made in Google+ photos will be shown.
Option 2: How to use Picasa-desktop edit a picture in Picasa-web-albums
This option only works if you have Picasa desktop software installed on your computer.Log in to Picasa-web-albums, using your Google account.
Navigate to the photo that you want to edit. (Make sure you're looking just at that photo, not at the album it is in - this can be confusing in cases when the photo is also the album cover.)
Choose Edit in Picasa from the Actions drop-down menu.
A pop-up window will tell you that your web browser wants to open another program (ie Picasa-desktop) to do the editing.
(The exact text is something like: "External Protocol Request: [your web browser] needs to launch an external application to handle picasa: links. The link requested is ... The following application will be launched if you accept this request c:\Program Files\Google\Picasa\Picasa3.exe ... If you did not initiate this request, it may represent an attempted attack on your system. Unless you took an explicit action to initiate this request, you should press Do Nothing.")
Choose Launch Application.
Choose Launch Application.
Picasa will load on your computer, and you will be asked to confirm that you do want to edit the selected picture. Choose Edit Image.
A copy of the picture that you want to edit is opened in the desktop-Picasa editing tools window.
From here you have access to all Picasa's standard photo editing tools (including the text tool for adding watermarks).
The photo you are working in is a copy taken from your Picasa-web-albums, it is not the same as the copy of the picture which may already be on your computer. It is stored in a directory of your Picasa-installation called "Online Edits", not in your main My Pictures directory. So if you choose a function like "Back to Library" you are taken to the Online Edits folder inside Picasa-desktop.
From here you can use all of Picasa-desktop's editing features, including straightening, red-eye reduction, text-editing, re-setting the neutral colour. The only exception is the Edit in Creative Kit option: this is still one of the options in Picasa-desktop, but if you use it, it takes a long time to load and then eventually says "Error connecting to Creative Kit... error 500" - and explains that Creative Kit has now been discontinued.
When you are finished editing, to put the edited photo back into the same Picasa-web-album that it came from, with the same file name and URL:
- Make sure that you are logged in from Picasa-desktop to the same Google account that you were using initially.
(Picasa-desktop remembers your sign-in details from the last time you used it - if it's different from what you need, just choose sign-out from the top-right corner, and then sign in to the correct account when asked.) - EITHER:
- Choose Share on Google+ (if you are using a Google + account)
- In the sharing-details window that opens, change the Album-name from Online Edits to the album that the photo came from originally and choose Upload
OR - Return to the Online Edits folder / library
- Save the changes using the Save icon
- Choose Enable Synch from the Sharing drop down.
- Wait for the changed photo to upload.
(I think Google have some work to do here - you can only control synching for the whole album, not for individual photos. I expect this to be improved in the future.)

Job Done: your Picasa-desktop-edited photo appears back in your online Picasa-web-albums with the changes that you just made, and any existing links to it (eg from your blog posts) will show the changed version of the picture. And you can put the edited picture into your blog posts or other websites in the usual way.
Related Articles
Introducing Picasa and Picasa-web-albums: an overviewStop automatic redirection to Google+ Photos
How to put a picture into a blog-post
Tools for applying copyright protection to your blog
how to backup and restore database in mysql
MySQL is one of the most famous opensource database. To transfer the database from one system to another you need to take the backup of the database from the source system and restore it on the target machine. In this post i am going to explain how to backup and restore a database on MySQL database.
Ads by Google
Ads by Google
First you need to install the MySQL GUI tool called the MySQL Query browser for make this process easier. You can download it from here.
Steps for backup a database.
Step 1:
Login on MySQL Query browser.
Step 2:
Click the Tools option on the menu bar and choose MySQL Administrator.

 Step 4 :
Click the 'New Project" button at the bottom of that window and select the database / databases you want to backup and add them into the backup content.

Steps for restore a database.
Step 1:
Follow steps 1 & 2 given above.
Step 2:
Select the restore option.

Step 1:
Login on MySQL Query browser.
Step 2:
Click the Tools option on the menu bar and choose MySQL Administrator.
Step 3:
Select the Backup option from the MySQL Administrator window.
Click the 'New Project" button at the bottom of that window and select the database / databases you want to backup and add them into the backup content.
Step 5:
Click the "Execute Backup Now" button at the bottom of that window and save the backup file in any location of your computer.
Steps for restore a database.
Step 1:
Follow steps 1 & 2 given above.
Step 2:
Select the restore option.
Step 3:
Click the "Open Backup File" button at the bottom of the window and choose the backup file. If the file is not shown the choose the all file type.
Step 4 :
Finally click the "Start Restore" button. After the restore refresh the database you can see that the database restored successfully.
Watch Video Tutorial of this Topic
Friday, 27 September 2013
how to save data using hibernate
In this post i explain how to insert data into MySQL database using Hibernate with the help of NetBeans IDE.
First you need to create a database and a table in the MySQL database. While creating the table keep in mind that, the table must contain a primary key field. I use the following query for create the table.
create table test_table (id int not null primary key auto_increment,name varchar(50), email varchar(50));
Ads by Google
Now you need to follow the steps given bellow.
Step 1 :
Open up the NetBeans IDE.
Step 2 :
Go to the services and expand the database.


Step 9 :
Create a form in your index.jsp as shown bellow.
Step 10:
Create a new servlet and add the following code segment in processRequest method as shown bellow.
Now run the index.jsp file and check data in your database table.
Now you need to follow the steps given bellow.
Step 1 :
Open up the NetBeans IDE.
Step 2 :
Go to the services and expand the database.
Step 3:
Now right click MySQL server and choose connect.
Step 4:
Now you need to enter your MySQL username and password and choose the database to which you want to insert data. Right click the database and choose connect.
Step 5:
Create a new Web Application and choose the hibernate framework and choose the database connection.
Step 6:
Right click the project name from the other option, choose Hibernate and from the hibernate folder choose the hibernate reverse engineering wizard.
Step 7:
Click next and choose the table / tables and click the add button and finally click finish.
Now you got your hibernate reverse engineering xml file.
Step 8:
Right click the project, choose other and from hibernate folder select the "Hibernate mapping files and POJOs" from database.
You need to provide a package name and click finish. Now you got your hibernate mapping xml file and the POJO class file as shown bellow.
Create a form in your index.jsp as shown bellow.
  <form action="TestServlet">
  Name :<input type="text" name="name"/>
  Email :<input type="text" name="email" />
  <input type="submit" value="SAVE" />
  </form>
Step 10:
Create a new servlet and add the following code segment in processRequest method as shown bellow.
    String name,email;
    name = request.getParameter("name");
    email = request.getParameter("email");
    SessionFactory sf = new Configuration().configure().buildSessionFactory();
    Session s = sf.openSession();
    Transaction tr = s.beginTransaction();
    TestTable t = new TestTable(name, email);
    s.save(t);
    tr.commit();
    s.close();
Now run the index.jsp file and check data in your database table.
Watch Video Tutorial of this Topic
AUD/USD 1st October 2013 Monthly Report
We can now see the completion of the break and extend pattern in the Quarterly cycles, from the 2nd Quarter down into the 3rd quarterly lows @ .8874.....
my view is that the AUD should try and move back up towards the 2013 yearly lows, which aligns with the 2014 50% level:- around .9457. This will probably take 3-6 months for it to happen. If that's the case, then this level is seen as a major resistance zone in 2014. (AUD Report 3rd August 2013)

my view is that the AUD should try and move back up towards the 2013 yearly lows, which aligns with the 2014 50% level:- around .9457. This will probably take 3-6 months for it to happen. If that's the case, then this level is seen as a major resistance zone in 2014. (AUD Report 3rd August 2013)

AUD Primary & Monthly cycles
We can see this exactly happen.... the completion of the break and extend pattern (#1 & #2), and now the rotation up into the Yearly lows and resistance, even though it happened in less than 2-months.
My view is that the AUD will drop down and follow the Primary cycle break & Extend pattern into the 2014 Yearly lows.
How quickly that happens will depend on when the FED decides to ease back on stimulus.
if it continues into the end of this year, then the 2014 Yearly 50% level is the resistance level for a move down.
If it happens later in this Quarter, then the 2014 Yearly lows will drop lower, and the AUD will continue down.
Wednesday, 25 September 2013
Page peel effect using jQuery
Page Peel is a popular page flip effect that when your cursor is passing over it, will show "what's behind" as if it would be a book. There are many ways to do this, many of them use flash files which makes it less customizable, however, the one that we will see in this post is made with jQuery.
Usually, the content that is "behind", is an image for subscribing to feed, but you can put any image and link to any page.
 Demo
Demo
You can see an example in this demo blog.
1. Log in to your Blogger dashsboard, select your blog > then go to Template > Edit HTML

2. Click anywhere inside the code area and search for the below tag by pressing the CTRL + F keys:
- You need to replace the url in red with the address of your blog, that will be the link to the blog's feed when the user clicks on the image behind, but you can put any URL in case you want to link to another page.
6. And that's it. To save the changes, click the Save template button.
Remember that this Page Peel effect uses jQuery, so you should only have one version of it, and if you use Scriptaculous or Mootools, you should apply some changes.
Usually, the content that is "behind", is an image for subscribing to feed, but you can put any image and link to any page.

You can see an example in this demo blog.
How to Add the Page Curl Effect on Blogger
1. Log in to your Blogger dashsboard, select your blog > then go to Template > Edit HTML

2. Click anywhere inside the code area and search for the below tag by pressing the CTRL + F keys:
</head>3. Just before </head> copy and paste this script:
<script src='http://ajax.googleapis.com/ajax/libs/jquery/1.10.2/jquery.min.js' type='text/javascript'/>4. Then before ]]></b:skin> (CTRL + F to find it - if necessary, click on the left arrow) paste these styles:
<script>
//<![CDATA[
$(document).ready(function(){
$("#pageflip").hover(function() {
$("#pageflip img , .msg_block").stop()
.animate({
width: '307px',
height: '319px'
}, 500);
} , function() {
$("#pageflip img").stop()
.animate({
width: '50px',
height: '52px'
}, 220);
$(".msg_block").stop()
.animate({
width: '50px',
height: '50px'
}, 200);
});
});
//]]>
</script>
/* Page Flip5. Finally, paste after <body> tag or if you can't find it, after this code:
----------------------------------------------- */
#pageflip {
position: relative;
right: 0;
top: 0px; /* Change to 30px if you have the navbar (navigation bar) */
float: right;
z-index:9;
}
#pageflip img {
width: 50px;
height: 52px;
z-index: 99;
position: absolute;
right: 0;
top: 0;
-ms-interpolation-mode: bicubic;
}
#pageflip .msg_block {
width: 50px;
height: 50px;
overflow: hidden;
position: absolute;
right: 0;
top: 0;
background: url(http://oi44.tinypic.com/2hheno6.jpg) no-repeat right top;
}
#pageflipMirror {
position: static;
right: 0;
top: 0;
float: right;
}
<body expr:class='"loading" + data:blog.mobileClass'>The following code:
<div id='pageflip'>- In blue you will see a URL - this is the URL of the image that, in this case, is an invitation to subscribe to the feed. You can change it later to another (should be of the same size).
<a href='http://name-of_your_blog.blogspot.com/atom.xml'>
<img src='http://oi40.tinypic.com/10fqnav.jpg' style='width: 50px; height: 52px; overflow-x: hidden; overflow-y: hidden;'/></a>
<div class='msg_block' style='width: 50px; height: 50px; overflow-x: hidden; overflow-y: hidden; '/>
</div>
- You need to replace the url in red with the address of your blog, that will be the link to the blog's feed when the user clicks on the image behind, but you can put any URL in case you want to link to another page.
6. And that's it. To save the changes, click the Save template button.
Remember that this Page Peel effect uses jQuery, so you should only have one version of it, and if you use Scriptaculous or Mootools, you should apply some changes.
Customize the scroll bar (scrollbar) with JScrollPane
JScrollPane is a jQuery script that allows you to change the blog' scroll bar, ie the browser scrollbar.
Although we can use CSS to change it, the problem is that is not standardized, because with CSS we can make it work only in Chrome and Safari; and in the case of Internet Explorer it also has its own code but obviously it only works in that browser (I don't know which versions). So what we will do then is to give a new look to the scrollbar but by using jQuery, so the change will be visible in all browsers.
 Demo
Demo
You can see an example in this test blog where the scroll bar has a different shape and color.
1. Go to Template > Edit HTML and before </head> paste this code:
2. Then locate this tag:
If you want the top and bottom limits to not appear (as in the example) then remove what is in red.
Remember that the script uses jQuery, so if you already have it, then don't put the script again (the first line of code). If you are using Scriptaculous or Mootools, then you should make some slight changes in order to make it work.
Maybe the code might appear long but better add the scripts directly in the template, so the scripts will always be available and load faster. Regardless of all of this the end result is quite aesthetic, don't you think?
Although we can use CSS to change it, the problem is that is not standardized, because with CSS we can make it work only in Chrome and Safari; and in the case of Internet Explorer it also has its own code but obviously it only works in that browser (I don't know which versions). So what we will do then is to give a new look to the scrollbar but by using jQuery, so the change will be visible in all browsers.

You can see an example in this test blog where the scroll bar has a different shape and color.
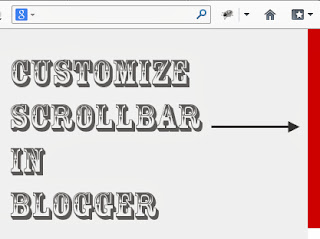
How to change the scrollbar on Blogger
1. Go to Template > Edit HTML and before </head> paste this code:
<script src='//ajax.googleapis.com/ajax/libs/jquery/1.10.2/jquery.min.js' type='text/javascript'/>
<style>
.jspContainer {overflow: hidden;position: relative;}.jspPane {position: absolute;}
.jspVerticalBar {position: absolute;top: 0;right: 0;width: 16px;height: 100%;background: #ccc;}
.jspHorizontalBar {position: absolute;bottom: 0;left: 0;width: 100%;height: 16px;background: #ccc;}
.jspVerticalBar *,.jspHorizontalBar * {margin: 0;padding: 0;}
.jspCap {display: none;}.jspHorizontalBar .jspCap {float: left;}
.jspTrack {
background: #fff; /* background color of the bar */
position: relative;
}
.jspDrag {
background: #CC0000; /* Color of the scrollbar */
position: relative;
top: 0;
left: 0;
cursor: pointer;
}
.jspHorizontalBar .jspTrack,
.jspHorizontalBar .jspDrag {
float: left;
height: 100%;
}
.jspArrow {
background: #888; /* The color of the scrollbar limits */
text-indent: -20000px;
display: block;
cursor: pointer;
}
.jspArrow.jspDisabled {
cursor: default;
background: #333; /* Color of the limits when the srollbar is reaching them */
}
.jspVerticalBar .jspArrow {
height: 16px;
}
.jspHorizontalBar .jspArrow {
width: 16px;
float: left;
height: 100%;
}
.jspVerticalBar .jspArrow:focus {outline: none;}.jspCorner {background: #eeeef4;float: left;height: 100%;}* html .jspCorner {margin: 0 -3px 0 0;}
html, body {
height: 100%;
margin: 0;
padding: 0;
}
#blog-container {
height: 100%;
margin: 0;
padding: 0;
overflow: auto;
}
</style>
<script>
//<![CDATA[
/*! Copyright (c) 2013 Brandon Aaron (http://brandonaaron.net)
* Licensed under the MIT License (LICENSE.txt).
* Version: 3.1.3
*/
(function (factory) {
if ( typeof define === 'function' && define.amd ) {
define(['jquery'], factory);
} else if (typeof exports === 'object') {
module.exports = factory;
} else {
// Browser globals
factory(jQuery);
}
}(function ($) {
var toFix = ['wheel', 'mousewheel', 'DOMMouseScroll', 'MozMousePixelScroll'];
var toBind = 'onwheel' in document || document.documentMode >= 9 ? ['wheel'] : ['mousewheel', 'DomMouseScroll', 'MozMousePixelScroll'];
var lowestDelta, lowestDeltaXY;
if ( $.event.fixHooks ) {
for ( var i = toFix.length; i; ) {
$.event.fixHooks[ toFix[--i] ] = $.event.mouseHooks;
}
}
$.event.special.mousewheel = {
setup: function() {
if ( this.addEventListener ) {
for ( var i = toBind.length; i; ) {
this.addEventListener( toBind[--i], handler, false );
}
} else {
this.onmousewheel = handler;
}
},
teardown: function() {
if ( this.removeEventListener ) {
for ( var i = toBind.length; i; ) {
this.removeEventListener( toBind[--i], handler, false );
}
} else {
this.onmousewheel = null;
}
}
};
$.fn.extend({
mousewheel: function(fn) {
return fn ? this.bind("mousewheel", fn) : this.trigger("mousewheel");
},
unmousewheel: function(fn) {
return this.unbind("mousewheel", fn);
}
});
function handler(event) {
var orgEvent = event || window.event,
args = [].slice.call(arguments, 1),
delta = 0,
deltaX = 0,
deltaY = 0,
absDelta = 0,
absDeltaXY = 0,
fn;
event = $.event.fix(orgEvent);
event.type = "mousewheel";
if ( orgEvent.wheelDelta ) { delta = orgEvent.wheelDelta; }
if ( orgEvent.detail ) { delta = orgEvent.detail * -1; }
if ( orgEvent.deltaY ) {
deltaY = orgEvent.deltaY * -1;
delta = deltaY;
}
if ( orgEvent.deltaX ) {
deltaX = orgEvent.deltaX;
delta = deltaX * -1;
}
if ( orgEvent.wheelDeltaY !== undefined ) { deltaY = orgEvent.wheelDeltaY; }
if ( orgEvent.wheelDeltaX !== undefined ) { deltaX = orgEvent.wheelDeltaX * -1; }
absDelta = Math.abs(delta);
if ( !lowestDelta || absDelta < lowestDelta ) { lowestDelta = absDelta; }
absDeltaXY = Math.max(Math.abs(deltaY), Math.abs(deltaX));
if ( !lowestDeltaXY || absDeltaXY < lowestDeltaXY ) { lowestDeltaXY = absDeltaXY; }
fn = delta > 0 ? 'floor' : 'ceil';
delta = Math[fn](delta / lowestDelta);
deltaX = Math[fn](deltaX / lowestDeltaXY);
deltaY = Math[fn](deltaY / lowestDeltaXY);
args.unshift(event, delta, deltaX, deltaY);
return ($.event.dispatch || $.event.handle).apply(this, args);
}
}));
/*
* jScrollPane - v2.0.0beta5 - 2010-09-18
* http://jscrollpane.kelvinluck.com/
* Copyright (c) 2010 Kelvin Luck
* Dual licensed under the MIT and GPL licenses.
*/
(function(b,a,c){b.fn.jScrollPane=function(f){function d(C,L){var au,N=this,V,ah,v,aj,Q,W,y,q,av,aB,ap,i,H,h,j,X,R,al,U,t,A,am,ac,ak,F,l,ao,at,x,aq,aE,g,aA,ag=true,M=true,aD=false,k=false,Z=b.fn.mwheelIntent?"mwheelIntent.jsp":"mousewheel.jsp";aE=C.css("paddingTop")+" "+C.css("paddingRight")+" "+C.css("paddingBottom")+" "+C.css("paddingLeft");g=(parseInt(C.css("paddingLeft"))||0)+(parseInt(C.css("paddingRight"))||0);an(L);function an(aH){var aL,aK,aJ,aG,aF,aI;au=aH;if(V==c){C.css({overflow:"hidden",padding:0});ah=C.innerWidth()+g;v=C.innerHeight();C.width(ah);V=b('<div class="jspPane" />').wrap(b('<div class="jspContainer" />').css({width:ah+"px",height:v+"px"}));C.wrapInner(V.parent());aj=C.find(">.jspContainer");V=aj.find(">.jspPane");V.css("padding",aE)}else{C.css("width",null);aI=C.outerWidth()+g!=ah||C.outerHeight()!=v;if(aI){ah=C.innerWidth()+g;v=C.innerHeight();aj.css({width:ah+"px",height:v+"px"})}aA=V.innerWidth();if(!aI&&V.outerWidth()==Q&&V.outerHeight()==W){if(aB||av){V.css("width",aA+"px");C.css("width",(aA+g)+"px")}return}V.css("width",null);C.css("width",(ah)+"px");aj.find(">.jspVerticalBar,>.jspHorizontalBar").remove().end()}aL=V.clone().css("position","absolute");aK=b('<div style="width:1px; position: relative;" />').append(aL);b("body").append(aK);Q=Math.max(V.outerWidth(),aL.outerWidth());aK.remove();W=V.outerHeight();y=Q/ah;q=W/v;av=q>1;aB=y>1;if(!(aB||av)){C.removeClass("jspScrollable");V.css({top:0,width:aj.width()-g});n();D();O();w();af()}else{C.addClass("jspScrollable");aJ=au.maintainPosition&&(H||X);if(aJ){aG=ay();aF=aw()}aC();z();E();if(aJ){K(aG);J(aF)}I();ad();if(au.enableKeyboardNavigation){P()}if(au.clickOnTrack){p()}B();if(au.hijackInternalLinks){m()}}if(au.autoReinitialise&&!aq){aq=setInterval(function(){an(au)},au.autoReinitialiseDelay)}else{if(!au.autoReinitialise&&aq){clearInterval(aq)}}C.trigger("jsp-initialised",[aB||av])}function aC(){if(av){aj.append(b('<div class="jspVerticalBar" />').append(b('<div class="jspCap jspCapTop" />'),b('<div class="jspTrack" />').append(b('<div class="jspDrag" />').append(b('<div class="jspDragTop" />'),b('<div class="jspDragBottom" />'))),b('<div class="jspCap jspCapBottom" />')));R=aj.find(">.jspVerticalBar");al=R.find(">.jspTrack");ap=al.find(">.jspDrag");if(au.showArrows){am=b('<a class="jspArrow jspArrowUp" />').bind("mousedown.jsp",az(0,-1)).bind("click.jsp",ax);ac=b('<a class="jspArrow jspArrowDown" />').bind("mousedown.jsp",az(0,1)).bind("click.jsp",ax);if(au.arrowScrollOnHover){am.bind("mouseover.jsp",az(0,-1,am));ac.bind("mouseover.jsp",az(0,1,ac))}ai(al,au.verticalArrowPositions,am,ac)}t=v;aj.find(">.jspVerticalBar>.jspCap:visible,>.jspVerticalBar>.jspArrow").each(function(){t-=b(this).outerHeight()});ap.hover(function(){ap.addClass("jspHover")},function(){ap.removeClass("jspHover")}).bind("mousedown.jsp",function(aF){b("html").bind("dragstart.jsp selectstart.jsp",function(){return false});ap.addClass("jspActive");var s=aF.pageY-ap.position().top;b("html").bind("mousemove.jsp",function(aG){S(aG.pageY-s,false)}).bind("mouseup.jsp mouseleave.jsp",ar);return false});o()}}function o(){al.height(t+"px");H=0;U=au.verticalGutter+al.outerWidth();V.width(ah-U-g);if(R.position().left==0){V.css("margin-left",U+"px")}}function z(){if(aB){aj.append(b('<div class="jspHorizontalBar" />').append(b('<div class="jspCap jspCapLeft" />'),b('<div class="jspTrack" />').append(b('<div class="jspDrag" />').append(b('<div class="jspDragLeft" />'),b('<div class="jspDragRight" />'))),b('<div class="jspCap jspCapRight" />')));ak=aj.find(">.jspHorizontalBar");F=ak.find(">.jspTrack");h=F.find(">.jspDrag");if(au.showArrows){at=b('<a class="jspArrow jspArrowLeft" />').bind("mousedown.jsp",az(-1,0)).bind("click.jsp",ax);x=b('<a class="jspArrow jspArrowRight" />').bind("mousedown.jsp",az(1,0)).bind("click.jsp",ax);
if(au.arrowScrollOnHover){at.bind("mouseover.jsp",az(-1,0,at));x.bind("mouseover.jsp",az(1,0,x))}ai(F,au.horizontalArrowPositions,at,x)}h.hover(function(){h.addClass("jspHover")},function(){h.removeClass("jspHover")}).bind("mousedown.jsp",function(aF){b("html").bind("dragstart.jsp selectstart.jsp",function(){return false});h.addClass("jspActive");var s=aF.pageX-h.position().left;b("html").bind("mousemove.jsp",function(aG){T(aG.pageX-s,false)}).bind("mouseup.jsp mouseleave.jsp",ar);return false});l=aj.innerWidth();ae()}else{}}function ae(){aj.find(">.jspHorizontalBar>.jspCap:visible,>.jspHorizontalBar>.jspArrow").each(function(){l-=b(this).outerWidth()});F.width(l+"px");X=0}function E(){if(aB&&av){var aF=F.outerHeight(),s=al.outerWidth();t-=aF;b(ak).find(">.jspCap:visible,>.jspArrow").each(function(){l+=b(this).outerWidth()});l-=s;v-=s;ah-=aF;F.parent().append(b('<div class="jspCorner" />').css("width",aF+"px"));o();ae()}if(aB){V.width((aj.outerWidth()-g)+"px")}W=V.outerHeight();q=W/v;if(aB){ao=1/y*l;if(ao>au.horizontalDragMaxWidth){ao=au.horizontalDragMaxWidth}else{if(ao<au.horizontalDragMinWidth){ao=au.horizontalDragMinWidth}}h.width(ao+"px");j=l-ao;ab(X)}if(av){A=1/q*t;if(A>au.verticalDragMaxHeight){A=au.verticalDragMaxHeight}else{if(A<au.verticalDragMinHeight){A=au.verticalDragMinHeight}}ap.height(A+"px");i=t-A;aa(H)}}function ai(aG,aI,aF,s){var aK="before",aH="after",aJ;if(aI=="os"){aI=/Mac/.test(navigator.platform)?"after":"split"}if(aI==aK){aH=aI}else{if(aI==aH){aK=aI;aJ=aF;aF=s;s=aJ}}aG[aK](aF)[aH](s)}function az(aF,s,aG){return function(){G(aF,s,this,aG);this.blur();return false}}function G(aH,aF,aK,aJ){aK=b(aK).addClass("jspActive");var aI,s=function(){if(aH!=0){T(X+aH*au.arrowButtonSpeed,false)}if(aF!=0){S(H+aF*au.arrowButtonSpeed,false)}},aG=setInterval(s,au.arrowRepeatFreq);s();aI=aJ==c?"mouseup.jsp":"mouseout.jsp";aJ=aJ||b("html");aJ.bind(aI,function(){aK.removeClass("jspActive");clearInterval(aG);aJ.unbind(aI)})}function p(){w();if(av){al.bind("mousedown.jsp",function(aH){if(aH.originalTarget==c||aH.originalTarget==aH.currentTarget){var aG=b(this),s=setInterval(function(){var aI=aG.offset(),aJ=aH.pageY-aI.top;if(H+A<aJ){S(H+au.trackClickSpeed)}else{if(aJ<H){S(H-au.trackClickSpeed)}else{aF()}}},au.trackClickRepeatFreq),aF=function(){s&&clearInterval(s);s=null;b(document).unbind("mouseup.jsp",aF)};b(document).bind("mouseup.jsp",aF);return false}})}if(aB){F.bind("mousedown.jsp",function(aH){if(aH.originalTarget==c||aH.originalTarget==aH.currentTarget){var aG=b(this),s=setInterval(function(){var aI=aG.offset(),aJ=aH.pageX-aI.left;if(X+ao<aJ){T(X+au.trackClickSpeed)}else{if(aJ<X){T(X-au.trackClickSpeed)}else{aF()}}},au.trackClickRepeatFreq),aF=function(){s&&clearInterval(s);s=null;b(document).unbind("mouseup.jsp",aF)};b(document).bind("mouseup.jsp",aF);return false}})}}function w(){F&&F.unbind("mousedown.jsp");al&&al.unbind("mousedown.jsp")}function ar(){b("html").unbind("dragstart.jsp selectstart.jsp mousemove.jsp mouseup.jsp mouseleave.jsp");ap&&ap.removeClass("jspActive");h&&h.removeClass("jspActive")}function S(s,aF){if(!av){return}if(s<0){s=0}else{if(s>i){s=i}}if(aF==c){aF=au.animateScroll}if(aF){N.animate(ap,"top",s,aa)}else{ap.css("top",s);aa(s)}}function aa(aF){if(aF==c){aF=ap.position().top}aj.scrollTop(0);H=aF;var aI=H==0,aG=H==i,aH=aF/i,s=-aH*(W-v);if(ag!=aI||aD!=aG){ag=aI;aD=aG;C.trigger("jsp-arrow-change",[ag,aD,M,k])}u(aI,aG);V.css("top",s);C.trigger("jsp-scroll-y",[-s,aI,aG])}function T(aF,s){if(!aB){return}if(aF<0){aF=0}else{if(aF>j){aF=j}}if(s==c){s=au.animateScroll}if(s){N.animate(h,"left",aF,ab)}else{h.css("left",aF);ab(aF)}}function ab(aF){if(aF==c){aF=h.position().left}aj.scrollTop(0);X=aF;var aI=X==0,aH=X==j,aG=aF/j,s=-aG*(Q-ah);if(M!=aI||k!=aH){M=aI;k=aH;C.trigger("jsp-arrow-change",[ag,aD,M,k])}r(aI,aH);V.css("left",s);C.trigger("jsp-scroll-x",[-s,aI,aH])}function u(aF,s){if(au.showArrows){am[aF?"addClass":"removeClass"]("jspDisabled");ac[s?"addClass":"removeClass"]("jspDisabled")}}function r(aF,s){if(au.showArrows){at[aF?"addClass":"removeClass"]("jspDisabled");
x[s?"addClass":"removeClass"]("jspDisabled")}}function J(s,aF){var aG=s/(W-v);S(aG*i,aF)}function K(aF,s){var aG=aF/(Q-ah);T(aG*j,s)}function Y(aN,aL,aF){var aJ,aH,s=0,aG,aK,aM;try{aJ=b(aN)}catch(aI){return}aH=aJ.outerHeight();aj.scrollTop(0);while(!aJ.is(".jspPane")){s+=aJ.position().top;aJ=aJ.offsetParent();if(/^body|html$/i.test(aJ[0].nodeName)){return}}aG=aw();aK=aG+v;if(s<aG||aL){aM=s-au.verticalGutter}else{if(s+aH>aK){aM=s-v+aH+au.verticalGutter}}if(aM){J(aM,aF)}}function ay(){return -V.position().left}function aw(){return -V.position().top}function ad(){aj.unbind(Z).bind(Z,function(aI,aJ,aH,aF){var aG=X,s=H;T(X+aH*au.mouseWheelSpeed,false);S(H-aF*au.mouseWheelSpeed,false);return aG==X&&s==H})}function n(){aj.unbind(Z)}function ax(){return false}function I(){V.unbind("focusin.jsp").bind("focusin.jsp",function(s){if(s.target===V[0]){return}Y(s.target,false)})}function D(){V.unbind("focusin.jsp")}function P(){var aF,s;C.attr("tabindex",0).unbind("keydown.jsp").bind("keydown.jsp",function(aJ){if(aJ.target!==C[0]){return}var aH=X,aG=H,aI=aF?2:16;switch(aJ.keyCode){case 40:S(H+aI,false);break;case 38:S(H-aI,false);break;case 34:case 32:J(aw()+Math.max(32,v)-16);break;case 33:J(aw()-v+16);break;case 35:J(W-v);break;case 36:J(0);break;case 39:T(X+aI,false);break;case 37:T(X-aI,false);break}if(!(aH==X&&aG==H)){aF=true;clearTimeout(s);s=setTimeout(function(){aF=false},260);return false}});if(au.hideFocus){C.css("outline","none");if("hideFocus" in aj[0]){C.attr("hideFocus",true)}}else{C.css("outline","");if("hideFocus" in aj[0]){C.attr("hideFocus",false)}}}function O(){C.attr("tabindex","-1").removeAttr("tabindex").unbind("keydown.jsp")}function B(){if(location.hash&&location.hash.length>1){var aG,aF;try{aG=b(location.hash)}catch(s){return}if(aG.length&&V.find(aG)){if(aj.scrollTop()==0){aF=setInterval(function(){if(aj.scrollTop()>0){Y(location.hash,true);b(document).scrollTop(aj.position().top);clearInterval(aF)}},50)}else{Y(location.hash,true);b(document).scrollTop(aj.position().top)}}}}function af(){b("a.jspHijack").unbind("click.jsp-hijack").removeClass("jspHijack")}function m(){af();b("a[href^=#]").addClass("jspHijack").bind("click.jsp-hijack",function(){var s=this.href.split("#"),aF;if(s.length>1){aF=s[1];if(aF.length>0&&V.find("#"+aF).length>0){Y("#"+aF,true);return false}}})}b.extend(N,{reinitialise:function(aF){aF=b.extend({},aF,au);an(aF)},scrollToElement:function(aG,aF,s){Y(aG,aF,s)},scrollTo:function(aG,s,aF){K(aG,aF);J(s,aF)},scrollToX:function(aF,s){K(aF,s)},scrollToY:function(s,aF){J(s,aF)},scrollBy:function(aF,s,aG){N.scrollByX(aF,aG);N.scrollByY(s,aG)},scrollByX:function(s,aG){var aF=ay()+s,aH=aF/(Q-ah);T(aH*j,aG)},scrollByY:function(s,aG){var aF=aw()+s,aH=aF/(W-v);S(aH*i,aG)},animate:function(aF,aI,s,aH){var aG={};aG[aI]=s;aF.animate(aG,{duration:au.animateDuration,ease:au.animateEase,queue:false,step:aH})},getContentPositionX:function(){return ay()},getContentPositionY:function(){return aw()},getIsScrollableH:function(){return aB},getIsScrollableV:function(){return av},getContentPane:function(){return V},scrollToBottom:function(s){S(i,s)},hijackInternalLinks:function(){m()}})}f=b.extend({},b.fn.jScrollPane.defaults,f);var e;this.each(function(){var g=b(this),h=g.data("jsp");if(h){h.reinitialise(f)}else{h=new d(g,f);g.data("jsp",h)}e=e?e.add(g):g});return e};b.fn.jScrollPane.defaults={showArrows:false,maintainPosition:true,clickOnTrack:true,autoReinitialise:false,autoReinitialiseDelay:500,verticalDragMinHeight:0,verticalDragMaxHeight:99999,horizontalDragMinWidth:0,horizontalDragMaxWidth:99999,animateScroll:false,animateDuration:300,animateEase:"linear",hijackInternalLinks:false,verticalGutter:4,horizontalGutter:4,mouseWheelSpeed:10,arrowButtonSpeed:10,arrowRepeatFreq:100,arrowScrollOnHover:false,trackClickSpeed:30,trackClickRepeatFreq:100,verticalArrowPositions:"split",horizontalArrowPositions:"split",enableKeyboardNavigation:true,hideFocus:false}})(jQuery,this);
//]]>
</script>
<script>
$(document).ready(function() {
$('.scroll-pane').jScrollPane({showArrows: true});
});
</script>
2. Then locate this tag:
<body>Or this line:
<body expr:class='"loading" + data:blog.mobileClass'>Under any of these two add this:
<div class='scroll-pane' id='blog-container'>3. Finally search for the </body> and above it paste this:
</div>Save the changes and that's all. In green you will see where you can change the scrollbar colors and its different areas, or add other styles, such as shadows, rounded corners, etc..
If you want the top and bottom limits to not appear (as in the example) then remove what is in red.
Remember that the script uses jQuery, so if you already have it, then don't put the script again (the first line of code). If you are using Scriptaculous or Mootools, then you should make some slight changes in order to make it work.
Maybe the code might appear long but better add the scripts directly in the template, so the scripts will always be available and load faster. Regardless of all of this the end result is quite aesthetic, don't you think?
Fundraiser: Fantasy Creature under Creative Commons Attribution-ShareAlike

5 3d models and 10 works of concept art will be released if the goal of USD5000 is reached.
Perks include t-shirts and voting rights. Voting will be based on short creature descriptions. The top 10 will be turned into concept art and of those, the top 5 will be turned into 3d models.
Two additional creature concepts and models for each additional USD2000 will be produced.
Justin Nichol will be creating the concept art. You can find his past contributions to the free and open pool of game art on his OpenGameArt profile page.
Jonathan Williamson - partner at CG Cookie (aka Blender Cookie) - will be creating the 3d models.
Tuesday, 24 September 2013
method overloading in java
Method overloading is one of the most important feature of the java programming language. One method of achieving polymorphism in java through method overloading.
Definition:
Multiple occurrence of a method / function in a class with difference in parameter type and (or) difference in number of parameters is called method / function overloading.
Consider the following example
      class OverloadTest
      {
      int a;
      String b;
      public void getValues()
      {
      a = 10;
      b = "no arguments";
      }
      public void getValues(int a)
      {
      this.a = a;
      b = "with integer arguments";
      }
      public void getValues(String b)
      {
      a = 20;
      this.b = b;
      }
      public void display()
      {
      System.out.println(b);
      System.out.println("Value of a ="+a);
      }
      }
      public class OverLoadDemo
      {
      public static void main(String args[])
      {
      OverloadTest test1 = new OverloadTest();
      test1.getValues();
      test1.display();
      OverloadTest test2 = new OverloadTest();
      test2.getValues(20);
      test2.display();
      OverloadTest test3 = new OverloadTest();
      test3.getValues("with string argument");
      test3.display();
      }
      }
In the example you can see that the method getValues() overloaded three times. First one is without any parameter, second one with an integer parameter and the final one with a String parameter. Whenever we invoke that method the compiler will find out the appropriate matching method definition and execute it. Here we invoke the three method definition with the following method calls
 test1.getValues();
 test2.getValues(20);
 test3.getValues("with string argument");
Watch Video Tutorial of this Topic
Go To Tutorial Index
Sunday, 22 September 2013
Stephen Cameron: Space Nerds in Space Interview and Crew Gameplay Video
A 15 minutes long video profile of Stephen Cameron was published on YouTube by Jack Younger - hacker (presumed) at TX/RX Labs.
The video includes an interview of Cameron's about his latest project Space Nerds in Space including inspiration and actual authentic gameplay video footage of the crew (highlights at 08:30).

Some of Word War Vi's history also is covered in the video (4:00).
Do I need to spell it out? Press that like button if you can! :)
Source: Announcement on the FreeGameDev forums

Video thumbnails
Do I need to spell it out? Press that like button if you can! :)
Source: Announcement on the FreeGameDev forums
Friday, 20 September 2013
Customizing Numbered Lists in Posts + 3 Examples
From the Compose tab of a Blogger post, we can create numbered lists using the "Numbered List" tool.


A numbered list is achieved through the HTML code of a "ordered list". You don't have to worry about adding the HTML, because the editor does it for you by using this tool. If you go to the HTML tab, you'll see that the list you created appears something like this:
By default, when using this tool, the numbered elements will look like:
The trick basically involves canceling the default numbering with "list-style: none", and then use automatic numbering properties: "counter-reset" and "counter-increment". Then the property "content" is added to the index of the counter that is created using the previous two properties.
How to Add Some Amazing Styles to Blogger ordered lists
Simply choose one of the styles below, then copy and paste the CSS code by going to Template > Customize > Advanced > Add CSS.
Some Blogger templates might not allow adding CSS in that location. In that case, for adding the CSS style you need to access the Template's HTML - from your Blogger Dashboard, go to Template > Edit HTML and paste the code just above the ]]></b:skin> tag (press the CTRL + F keys to find it - you might need to click on the arrow to expand the code and after that search it again)
Examples
Here are three examples that I have prepared for those of you who want to customize numbered lists:
Style 1
Style 2
Style 3
Compatibility:
This will work in all browsers including IE8 - in the case of Internet Explorer 7, the number' styles will not be seen as it does not support the :before or :after pseudo-elements. However, I have added a line in the CSS that's specific for that browser and will bring up the default numbering of the ordered list.
Hopefully this will be useful for you ;)
A numbered list is achieved through the HTML code of a "ordered list". You don't have to worry about adding the HTML, because the editor does it for you by using this tool. If you go to the HTML tab, you'll see that the list you created appears something like this:
<ol>This tool will automatically number each element of the list taking an "order", hence the name "ordered lists in HTML". In each element a number is successively generated (from 1 onwards), though you can not see this in the HTML code.
<li>The content of the 1st. element</li>
<li>The content of the 2nd. element</li>
<li>The content of the 3rd. element</li>
<li>The content of the 4th. element</li>
etc...
</ol>
Using ordered lists in posts
Creating numbered lists is very suitable for giving any instructions. It is ideal for cooking blogs where the steps in a recipe has to be numbered, or in those blogs that share tutorials... but can be used in any type of blog that need to number something.By default, when using this tool, the numbered elements will look like:
- Nulla tincidunt, neque nec laoreet iaculis, tellus libero sagittis nisl, sed commodo lacus nulla ac sapien. Pellentesque vel magna vitae diam hendrerit bibendum tempus at magna.
- Nulla pellentesque egestas sagittis. Cras blandit bibendum ante nec placerat. Nulla volutpat diam non quam suscipit et ornare nisi porttitor. Quisque eget elit nulla, et imperdiet nisi.
- Vivamus sit amet nibh vel enim aliquam auctor. Phasellus fringilla eros leo, nec varius lacus. Vestibulum id dolor a nisl venenatis varius in nec enim. Pellentesque feugiat arcu ac purus rhoncus dapibus.
- Etiam rutrum quam ac est bibendum cursus. In porttitor nunc odio, vel porttitor nisi. Pellentesque velit est, sodales luctus feugiat et, porta quis lacus. Vivamus non mauris urna, non commodo dui.
The trick basically involves canceling the default numbering with "list-style: none", and then use automatic numbering properties: "counter-reset" and "counter-increment". Then the property "content" is added to the index of the counter that is created using the previous two properties.
How to Add Some Amazing Styles to Blogger ordered lists
Simply choose one of the styles below, then copy and paste the CSS code by going to Template > Customize > Advanced > Add CSS.
Some Blogger templates might not allow adding CSS in that location. In that case, for adding the CSS style you need to access the Template's HTML - from your Blogger Dashboard, go to Template > Edit HTML and paste the code just above the ]]></b:skin> tag (press the CTRL + F keys to find it - you might need to click on the arrow to expand the code and after that search it again)
Examples
Here are three examples that I have prepared for those of you who want to customize numbered lists:
Style 1
- Nulla tincidunt, neque nec laoreet iaculis, tellus libero sagittis nisl, sed commodo lacus nulla ac sapien. Pellentesque vel magna vitae diam hendrerit bibendum tempus at magna.
- Nulla pellentesque egestas sagittis. Cras blandit bibendum ante nec placerat. Nulla volutpat diam non quam suscipit et ornare nisi porttitor. Quisque eget elit nulla, et imperdiet nisi.
- Vivamus sit amet nibh vel enim aliquam auctor. Phasellus fringilla eros leo, nec varius lacus. Vestibulum id dolor a nisl venenatis varius in nec enim. Pellentesque feugiat arcu ac purus rhoncus dapibus.
- Etiam rutrum quam ac est bibendum cursus. In porttitor nunc odio, vel porttitor nisi. Pellentesque velit est, sodales luctus feugiat et, porta quis lacus. Vivamus non mauris urna, non commodo dui.
.post ol{
counter-reset: li;
list-style: none;
*list-style: decimal;
font: 13px 'trebuchet MS', 'lucida sans'; /* font size of each element */
padding: 0;
margin-bottom: 4em;
text-shadow: 0 1px 0 rgba(255,255,255,.5);
font-weight: bold;
}
.post ol li{
position: relative;
display: block;
padding: .4em .4em .4em 4em;
*padding: .4em;
margin: .5em 0;
text-decoration: none;
border-radius: .3em;
transition: all .3s ease-out;
}
.post ol li:hover:before{
transform: rotate(360deg);
}
.post ol li:before{
content: counter(li);
counter-increment: li;
position: absolute;
left: 10px;
top: 50%;
margin-top: -1.3em;
height: 2em;
width: 2em;
line-height: 2em;
color: #fff; /* text color of numbers */
background: #FA8022; /* background color of numbers */
border: .2em solid #fff; /* border color */
-webkit-box-shadow: 0 8px 5px -7px #888;
-moz-box-shadow: 0 8px 5px -7px #888;
box-shadow: 0 8px 5px -7px #888;
text-align: center;
font-weight: bold;
border-radius: 2em;
transition: all .3s ease-out;
}
Style 2
- Nulla tincidunt, neque nec laoreet iaculis, tellus libero sagittis nisl, sed commodo lacus nulla ac sapien. Pellentesque vel magna vitae diam hendrerit bibendum tempus at magna.
- Nulla pellentesque egestas sagittis. Cras blandit bibendum ante nec placerat. Nulla volutpat diam non quam suscipit et ornare nisi porttitor. Quisque eget elit nulla, et imperdiet nisi.
- Vivamus sit amet nibh vel enim aliquam auctor. Phasellus fringilla eros leo, nec varius lacus. Vestibulum id dolor a nisl venenatis varius in nec enim. Pellentesque feugiat arcu ac purus rhoncus dapibus.
- Etiam rutrum quam ac est bibendum cursus. In porttitor nunc odio, vel porttitor nisi. Pellentesque velit est, sodales luctus feugiat et, porta quis lacus. Vivamus non mauris urna, non commodo dui.
.post ol{
counter-reset:li;
list-style: none;
*list-style: decimal;
margin-left:0;
padding-left:0
}
.post ol li{
position:relative;
margin:0 0 20px 15px !important;
padding:4px 5px 4px 10px !important;
list-style:none;
*list-style: decimal;
border-bottom:1px solid #e2e3e2; /* bottom border of each element */
background:#f2f2f2; /* background color of each element */
text-indent:14px;
}
.post ol li:before{
content:counter(li);
counter-increment:li;
position:absolute;
top:-6px;
left:-10px;
font-family:'Oswald', serif;
font-size:14px; /* size of the numbers */
width:20px;
margin:0 0 10px 0;
padding:4px !important;
color:#A5A5A5; /* color of the numbers */
text-align:left;
background:#e2e2e2; /* background color of the numbers */
text-indent:6px;
text-shadow: 1px 3px 2px #fff;
}
.post ol li:after{
content:"";
position:absolute;
top:-5px;
left:17px;
width: 0px;
height: 0px;
border-style: solid;
border-width: 5px 0 0 5px;
border-color: transparent transparent transparent #aeaeae; /* color of the triangle behind */
}
Style 3
- Nulla tincidunt, neque nec laoreet iaculis, tellus libero sagittis nisl, sed commodo lacus nulla ac sapien. Pellentesque vel magna vitae diam hendrerit bibendum tempus at magna.
- Nulla pellentesque egestas sagittis. Cras blandit bibendum ante nec placerat. Nulla volutpat diam non quam suscipit et ornare nisi porttitor. Quisque eget elit nulla, et imperdiet nisi.
- Vivamus sit amet nibh vel enim aliquam auctor. Phasellus fringilla eros leo, nec varius lacus. Vestibulum id dolor a nisl venenatis varius in nec enim. Pellentesque feugiat arcu ac purus rhoncus dapibus.
- Etiam rutrum quam ac est bibendum cursus. In porttitor nunc odio, vel porttitor nisi. Pellentesque velit est, sodales luctus feugiat et, porta quis lacus. Vivamus non mauris urna, non commodo dui.
.post ol{Note: In blue are highlighted the values that can be edited in the CSS of these three examples, and added some comments highlighted in /* green */, so that you can know what each thing does.
counter-reset: li;
list-style: none;
*list-style: decimal;
padding: 0;
margin-bottom: 4em;
font: 13px 'trebuchet MS', 'lucida sans'; /* font size of each element */
text-shadow: 0 1px 0 rgba(255,255,255,.5);
}
.post ol li{
position: relative;
display: block;
padding: .4em .4em .4em .8em;
*padding: .4em;
margin: .5em 0 .5em 4.5em;
text-decoration: none;
}
.post ol li:before{
content: counter(li);
counter-increment: li;
position: absolute;
left: -30px;
top: 50%;
margin-top: -1em;
background: #bada55; /* background color of the numbers */
height: 2em;
width: 2em;
line-height: 2em;
text-align: center;
font-weight: bold;
}
.post ol li:after{
position: absolute;
content: '';
left: -5px;
margin-top: -.7em;
top: 50%;
width: 0;
height: 0;
border-top: 8px solid transparent;
border-bottom: 8px solid transparent;
border-left:8px solid #bada55; /* background color of the right arrow*/
}
Compatibility:
This will work in all browsers including IE8 - in the case of Internet Explorer 7, the number' styles will not be seen as it does not support the :before or :after pseudo-elements. However, I have added a line in the CSS that's specific for that browser and will bring up the default numbering of the ordered list.
Hopefully this will be useful for you ;)
4 Different Styles For the Popular Posts Widget
Blogger allows us to easily add a "Popular Posts" widget, that we select from its list of gadgets, and we can do that by going to the "Layout" of our Blog.
This gadget, as the name implies, shows which are the most visited blog posts, and you can set it to display the info you want in four possible combinations: (1) only the title of the post, (2) a thumbnail of the image and the post title, (3) post title with a summary, and (4) post title with a thumbnail and a post snippet.

This is an element that you shouldn't miss in your blog because it encourages your visitors to navigate through your content and that can result in higher income if you're monetizing your blog because it would generate an increase in the number of pages visited, and in turn, can attract the users' interest to subscribe to the blog and to read interesting content.
1. Select the "Layout" tab and add the "Popular Posts" gadget in that part of your blog you want to appear, such as in your sidebar, by clicking on "Add a Gadget".
2. Configure the widget to show only the post titles. You can do this by clicking on the "image thumbnail" and "snippet" checkboxes, as shown in the following image.
 3. After configuring the widget, save the changes by clicking on Save, and then Save arrangement.
1. Choose a style, then copy the CSS that appears below the image that shows the style.
2. Select the "Template" tab, then click on Customize > Advanced > Add CSS and then paste the CSS style that you like the most.
 3. Once you add the CSS, Save changes by clicking on the "Apply to Blog" button.
Note: Some Blogger templates might not allow adding CSS in that location. In that case, for adding the CSS style you need to access the Template's HTML - from your Blogger Dashboard, go to Template > Edit HTML and paste the code just above the ]]></b:skin> tag (press the CTRL + F keys to find it - you might need to click on the arrow to expand the code and after that search it again)
And that's it! You've already customized the popular posts widget when it shows only post titles.
Styles
Here is the CSS of each style, just choose the one you like the best and put it on your blog. You can see each of these styles in action in the following demo blog:
http://demo-blog343.blogspot.com
Style 1:

Style 2:

Style 3:

Style 4:

Final Notes
All the CSS is valid. I just have to mention that the numbering is not visible in Internet Explorer 7, since that version of the browser does not support properties that make the numbers appear. For example in the 4th style, the circles look squared in IE8 and earlier versions since, these versions do not support a property that makes them look as circles.
This gadget, as the name implies, shows which are the most visited blog posts, and you can set it to display the info you want in four possible combinations: (1) only the title of the post, (2) a thumbnail of the image and the post title, (3) post title with a summary, and (4) post title with a thumbnail and a post snippet.

This is an element that you shouldn't miss in your blog because it encourages your visitors to navigate through your content and that can result in higher income if you're monetizing your blog because it would generate an increase in the number of pages visited, and in turn, can attract the users' interest to subscribe to the blog and to read interesting content.
Preliminary steps: Add the gadget, if you haven't done it yet.
1. Select the "Layout" tab and add the "Popular Posts" gadget in that part of your blog you want to appear, such as in your sidebar, by clicking on "Add a Gadget".
2. Configure the widget to show only the post titles. You can do this by clicking on the "image thumbnail" and "snippet" checkboxes, as shown in the following image.

How to add the CSS to create the style of the Popular Posts widget
1. Choose a style, then copy the CSS that appears below the image that shows the style.
2. Select the "Template" tab, then click on Customize > Advanced > Add CSS and then paste the CSS style that you like the most.

Note: Some Blogger templates might not allow adding CSS in that location. In that case, for adding the CSS style you need to access the Template's HTML - from your Blogger Dashboard, go to Template > Edit HTML and paste the code just above the ]]></b:skin> tag (press the CTRL + F keys to find it - you might need to click on the arrow to expand the code and after that search it again)
And that's it! You've already customized the popular posts widget when it shows only post titles.
Styles
Here is the CSS of each style, just choose the one you like the best and put it on your blog. You can see each of these styles in action in the following demo blog:
http://demo-blog343.blogspot.com
Style 1:
#PopularPosts1 h2{
padding:7px 0 3px 0;
width:100%;
margin-bottom:10px;
font-size:1.3em;
text-indent:-12px;
font-size:18px;
text-align:center;
color: #757575; /* Color of the widget's title */
}
#PopularPosts1 ul{
list-style:none;
counter-reset:li;
padding:8px 0px 1px;
left:-7px;
width:290px;
}
#PopularPosts1 li{
position:relative;
margin:0 0 10px 0;
padding: 3px 2px 0 17px;
left:-5px;
width:285px;
}
#PopularPosts1 ul li{
background: #eee;
position: relative;
display: block;
padding: .4em .2em .4em 2em;
*padding: .2em;
margin: .5em 0;
background: #ddd;
text-decoration: none;
border-radius: .3em;
transition: all .3s ease-out;
}
#PopularPosts1 ul li:before{
content: counter(li);
counter-increment: li;
position: absolute;
top: 50%;
margin: -1.3em;
height: 2em;
width: 2em;
line-height: 2em;
font-size: 15px;
color: #fff; /* text color of numbers */
background: #FB8835; /* background color of numbers */
border: .2em solid #fff; /* border color */
-webkit-box-shadow: 0 8px 5px -7px #888;
-moz-box-shadow: 0 8px 5px -7px #888;
box-shadow: 0 8px 5px -7px #888;
text-align: center;
font-weight: bold;
border-radius: 2em;
position: absolute;
left: 0;
transition: all .3s ease-out;
}
#PopularPosts1 ul li:hover{
background: #eee;
}
#PopularPosts1 ul li:hover:before{
transform: rotate(360deg);
}
#PopularPosts1 ul li a{
font: 14px Georgia, serif; /* font size of post titles */
text-shadow: 0 -1px 2px #fff;
color: #444;
display:block;
min-height:25px;
text-decoration:none;
text-transform: uppercase;
}
#PopularPosts1 ul li a:hover{
color: #444;
}
Style 2:
#PopularPosts1 h2{
position:relative;
padding:8px 10px 6px 10px;
width:100%;
margin-bottom: 5px;
font-size:17px;
color:#757575; /* Color of the widget's title */
text-align:left;
}
#PopularPosts1 ul{
list-style:none;
counter-reset:li;
padding:10px;
left:-8px;
width:100%;
}
#PopularPosts1 li{ /* Styles of each element */
width:100%;
position:relative;
left:0;
margin:0 0 1px 12px;
padding:4px 5px;
}
#PopularPosts1 ul li:before{
content: counter(li);
counter-increment: li;
position: absolute;
left: -30px;
top: 50%;
margin-top: -13px;
background: #8E8E8E; /* background color of the numbers */
height: 1.9em;
width: 2em;
line-height: 2em;
text-align: center;
font-weight: bold;
color: #fff;
font-size: 14px;
}
#PopularPosts1 ul li:after{
position: absolute;
content: '';
left: -2px;
margin-top: -.7em;
top: 50%;
width: 0;
height: 0;
border-top: 8px solid transparent;
border-bottom: 8px solid transparent;
border-left:10px solid #8E8E8E; /* background color of the right arrow*/
}
#PopularPosts1 ul li a{
color: #444;
text-decoration: none;
font-size:15px;
}
#PopularPosts1 ul li {
position: relative;
display: block;
padding: .4em .4em .4em .8em;
*padding: .4em;
margin: .5em 0 .5em 0.4em;
background: #ddd;
transition: all .3s ease-out;
text-decoration:none;
transition: all .1s ease-in-out;
}
#PopularPosts1 ul li:hover{
background: #eee; /* Background color on mouseover */
}
#PopularPosts1 ul li a:hover{
color:#444; /* Link color on mouseover */
margin-left:3px;
}
Style 3:
#PopularPosts1 h2{
position:relative;
right:-2px;
padding:8px 63px 6px 17px;
width:100%;
margin:0;
font-size:16px;
background:#4F4F4F; /* Background color */
color:#f2f2f2; /* Color of the widget's title */
text-align:left;
text-indent:18px;
}
#PopularPosts1 h2:before{
position:absolute;
content:"";
top:36px;
right:0px;
width: 0px;
height: 0px;
border-bottom:12px outset transparent;
border-left:12px solid #000000;
}
#PopularPosts1 h2:after{
position:absolute;
content:"";
top:-6px;
left:-5px;
width: 0px;
height: 0px;
border-bottom:24px outset transparent;
border-top:24px outset transparent;
border-left:24px solid #ffffff; /* Arrow background color on the left */
}
#PopularPosts1 ul{
list-style:none;
counter-reset:li;
padding:10px;
left:-8px;
width:100%;
}
#PopularPosts1 li{
width:100%;
position:relative;
left:0;
margin:7px 0 16px 12px;
padding:10px 4px 0 5px;
}
#PopularPosts1 ul li:before{
content:counter(li);
counter-increment:li;
position:absolute;
top:-2px;
left:-20px;
font-size:35px;
width:20px;
color:#888888;
}
#PopularPosts1 ul li a{
display:block;
font-size:16px; /* Font size of the links */
color: #666; /* Color of the links */
text-decoration:none;
transition: all .1s ease-in-out;font-weight: bold;
}
#PopularPosts1 ul li a:hover{
color:#3366FF;
margin-left:3px;
}
Style 4:
#PopularPosts1 h2{
padding:8px 10px 3px 0;
width:100%;
margin:0;
font-size:16px;
position:relative;
left:-20px;
display:block;
border-bottom:2px solid #ccc;
}
#PopularPosts1 ul{
list-style:none;
counter-reset:li;
padding:10px;
width:100%;
}
#PopularPosts1 li{ /* Styles of each element */
width:100%;
position:relative;
left:0;
margin:0 0 6px 10px;
padding:4px 5px;
}
#PopularPosts1 ul li:before{ /* Style of the numbers */
content:counter(li);
counter-increment:li;
position:absolute;
top:3px;
left:-39px;
font-size:21px;
width:28px;
height:28px;
border-radius: 50%;
color:#777; /* Text color */
border: 2px solid #ddd; /* Rounded border color */
padding:0;
text-indent:9px;
}
#PopularPosts1 ul li a{
display:block;
position:relative;
left:-45px;
width:100%;
margin:0;
min-height:28px;
padding: 5px 3px 3px 39px;
color:#333; /* color of the links */
text-decoration:none;
font-size:14px; /* Font size of the links */
font-style: italic;
}
#PopularPosts1 ul li a:hover{
color:#3366ff;
margin-left:3px;
}
Final Notes
All the CSS is valid. I just have to mention that the numbering is not visible in Internet Explorer 7, since that version of the browser does not support properties that make the numbers appear. For example in the 4th style, the circles look squared in IE8 and earlier versions since, these versions do not support a property that makes them look as circles.
Subscribe to:
Comments (Atom)