Tuesday, 26 January 2016

How to use your own icons in Google My Maps

This article shows how to use your own icons to label places in maps that you make with the My Maps' feature in  Google Maps.


My Maps is a tool provided by Google Maps that lets you make a map showing a specific collection of places.

Why is this helpful?   Well, you can search for a collection of places in regular Google Maps, and share the maps you can see - but if you do this, other people will see different places that are marked on the version of the maps that Google shows them, not the same as the places that are marked for you.    To guarantee what set of places other people see, you need to make a map in My Maps, and then you can share this specific map.

My Maps provides a standard set of icons that can be used for labelling places - and these days it's a pretty impressive standard set.   But it still doesn't include numbers, letters or other labels - and the icons provided may not be styled the way you would like.

Luckily Google have provided a way for you to use any icon to label points on a map you make.


How to use your own custom icon in a My Maps map

Make your map, and add the place(s) you would like to attach a custom icon to.

In the bar on the left hand side, hover your mouse over a place-marker which you want to assign a specific icon to.   

The line for that item will highlight slightly, and a small colour / paint-tipping icon appear will to the right of the place description, like this:


Click on the paint-tipping / colour icon

This opens a small hover-window, where you can choose the colour or icon shape.


Click the button at the bottom labelled More Icons.

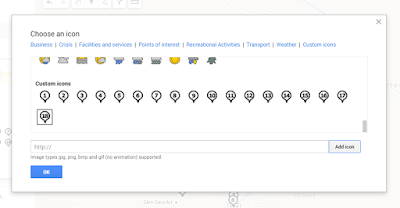
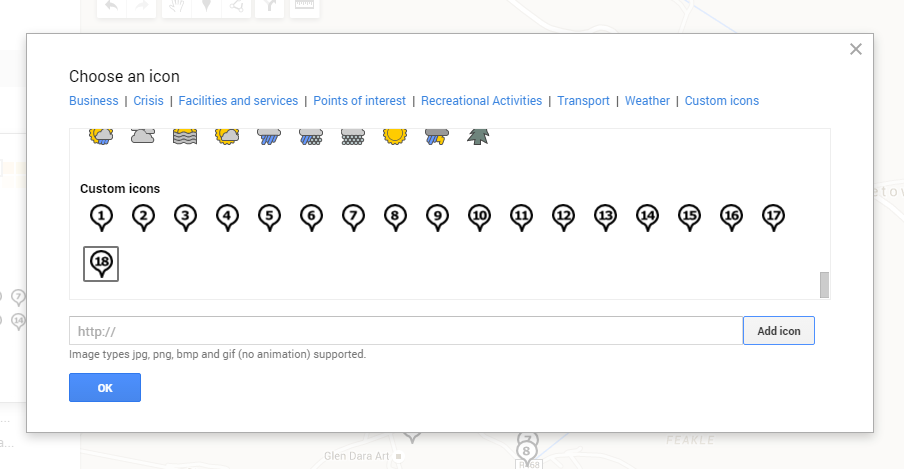
On the pop-up that opens, you are able to select an icon from one of the categories available (currently Business, Crisis, Facilities and services, Points of interest, Recreational Activities, Transport, and  Weather).   Don't select any of these.


Instead, at the bottom of the screen, enter in the URL (ie website address) of a  file that you want to use as a marker.  (.jpg  .png  .bmp, and .gif   files can all be used).

Click Add Icon.

This adds the picture that you linked to the list of items available under Custom Icons, and selects it.


Click Ok to apply this icon to the point-marker that is being edited.


Job done!   Your map now has a marker that is made from your own image.


Things to be aware of / Troubleshooting

  • You need to load the image file to a file-host which handles picture files yourself:   there is no option to load a file directly from the More Icons tab.
  • The image file needs to stay, unchanged, in the place where you linked to - and that place has to be available to anyone who might look at the map: if you are sharing the map with "anyone in the world" then the markers need to be available like that, too.
  • The image file should be small to speed up loading time:   images in the set of markers I use are approx 2k each.
  • Markers will be displayed in the same small size as Google's markers, ie 32x32 pixels:   there's no point using a large, detailed photograph if it will shrunk down to so tiny that the details can't be seen.
  • You must provide the actual URL of the picture you want to use as a marker, not the Google Photos shareable link.   (Because the latter includes more than just the photo).
  • I don't know any way to bulk-load many custom icons into a My Maps map at the same time.   (There was a way to do this in the old Google Custom Maps, but this doesn't work in My Maps.)    Or to make one icon available to many / all your your My Maps at once.   If you have a solution for this, please leave a comment below.
  • If you your icon background to be transparent, then you need to create it in RGB colour mode: Icons with a transparent background created in Indexed colour mode don't work.


Related Articles

File hosts:  places used to store pictures used in Blogger

Hosting pictures outside of Google Photos / Picasa Web Albums

How to get shareable links to Google Photos

7 Data Recovery v3.6 Enterprise Serial Keys


7 Data Recovery
7-Data Recovery is an easy to use, all-in-one and even more is a complete data recovery software for rescuing files (Documents, Photos, Videos, Musics, etc.) under almost any conditions. 7-Data Recovery Suite allow you to recover any accidentally deleted files, damaged or formatted hard drive, and lost or deleted partition from from local and external drives, memory card, camera, android phones directly from your PC.
Features
  • Recover any files from accidentally deleted files
  • Recover any files from Lost and Deleted Partitions
  • Recover any files from Memory Card
  • Recover any files from Mobile Phone
  • Complete Recovery from Local and External Drive
How to install?
  1. Install 7-Data Recovery Suite
  2. Run and register with Key in Key.rar
Screenshots
Download

Kaspersky Reset Trial 5.1.0.7 Final (Trial Resetter)


Kaspersky Reset Trial (Trial Resetter)
Kaspersky Reset Trial – a program to reset the trial ( for reuse trial period ) antivirus Kaspersky Lab products .
Supported Programs
  • Kaspersky Antivirus 2012 to Kaspersky Antivirus 2016
  • Kaspersky Internet Security 2011 to Kaspersky Internet Security 2016
  • Kaspersky Total Security 2016
  • Kaspersky CRYSTAL 2.0.
  • Kaspersky CRYSTAL 3.0.
  • Kaspersky Endpoint Security 8
  • Kaspersky Endpoint Security 10
  • Kaspersky Endpoint Security 8
  • Kaspersky Endpoint Security 10
  • Kaspersky Anti-Virus 6.0 for Windows Workstations
  • Kaspersky Anti-Virus 6.0 for Windows Servers
What’s New
  • The algorithm of preservation and transfer activation of anti-virus products.
  • Improved code.
Screenshots
Downloads

Monday, 25 January 2016

Making someone an author on your blog

This article shows you how to set up another person (ie another Google account) as an author for your blog.

Google, Blog-Authors and Blogger

Setting someone up as an "author" in Blogger is one way that you can let other people post to your blog.

It's easy to do: you tell blogger to create an invitation, which sends the person an email saying you would like to be an author, they click a link in the email and then sign in with a Google account to accept the invitation. And once it is done, the person can write and edit their own posts.
All you need to know is the person's email address: it doesn't matter if it's a gmail address or not.  You can send invitations to people with hotmail, yahoo, and indeed any email address where your invitee can read their email.

 However the other person will need to use a Google account (which doesn't necessarily include Gmail) to accept the invitation: don't waste time inviting people who are allergic to Google and not willing to sign up for an account.


How to make someone an author on your blog

Send them an invitation:
  • Go to Settings > Basic > Permissions
  • Beside Blog Authors, click + Add Authors
  • Enter the email address of the person you want to invite
  • Click Ok


A few minutes later, the email address that you sent to receives an email invitation, like this, from no-reply@google.com:
-------- Original Message --------
Subject: You have been invited to contribute to AnotherTestBlog
Date: Tue, 06 Dec 2011 20:47:45 +0000
From:   THE NAME OF FROM YOUR BLOGGER PROFILE 
To: maryc@act.nz

The Blogger user Mary has invited you to contribute to the blog: AnotherTestBlog.

To contribute to this blog, visit:
http://www.blogger.com/i.g?inviteID=468-GEEKY-LOOKING-CODE-973&blogID=31-GEEKY-LOOKING-CODE-83

You'll need to sign in with a Google Account to confirm the invitation and start posting to this blog. If you don't have a Google Account yet, we'll show you how to get one in minutes.

To learn more about Blogger and starting your own free blog visit http://www.blogger.com.


When the person who gets the email clicks on the link, they are taken to Blogger, and asked to sign in

Once they have clicked the link and sign in, the Google account that they log in with has "author rights" to your blog (just the one you invited them to, not any others you've made).

The person does not need to have a gmail or Google account for you to invite them to be an author - but they will need to sign in using a Google account (new or existing) to accept the invitation.


What you will see

Once the person has accepted the invitation, the Google account name (which looks like an email address) that they use to accept it is shown as an author on the permissions tab (the one that you went to to invite them to be an author):


If they accept the invitation by signing to Google in with a different email address than the one you invited, you will get a message telling you about this. It says
-------- Original Message --------
Subject: Your invitation was accepted using a different email address
Date: Tue, 06 Dec 2011 22:51:33 +0000
From: Blogger
To: YOUR-EMAIL-ADDRESS

Your invitation for THE-EMAIL-ADDRESS-YOU-INVITED for your private blog "AnotherTestBlog" has been accepted, but using a different email address. It has been accepted by THE-ACCEPTING-EMAIL ADDRESS.

If your invitation has been accepted by someone you do not know or did not intend to invite, please visit the Permissions tab of your blog where you can choose to revoke access.

Thanks,
 The Blogger Team


What your new author will see

When your new author logs in to Blogger.com - using the Google account they accepted your invitation with - they see a regular Blogger dashboard, except that they only have access to a limited range of functions:


An author can:

  • Create a post,
  • Edit the date for posts they have made
  • Turn comments of for posts they can edit (provided the default setting is On)
  • Edit a post that they made
  • Add a mobile device so they can post using SMS/MMS - (this may only work in certain countries)
  • Set themselves up to post using email (the mail2Post feature) - note that their "secret words" address is different to yours - and that an author could use this feature to let anyone else post from their account.
  • Remove themselves as an author


An author cannot:

  • Edit posts made by other authors or administrators
  • Change the template, layout or gadgets
  • Change the blog's URL, title or description
  • Set up for any email address to receive comment-moderation alert messages
  • Moderate comments (even about their own posts), or change the global comments settings
  • Edit any of the blog's Pages
  • See the blog's statistics
  • Install AdSense into the blog (although they can put ad-units of their own inside their own posts)
  • Give other people permission to write on the blog - except by sharing their own mail2Post "secret words" address.
  • Change the default language and date/time settings for the blog
  • Alter the RSS feed settings in any way
  • Set up Google Analytics for the blog
  • Edit the Adult-content warning setting, or the blog's Open-ID URL.


Troubleshooting

Be sure your transfer works

If you are accepting the invitation yourself (eg you are transferring the blog to another Google account that you control), then make sure that you either
  • [Recommended]: use a different browser for each Google account, or
  • Each time you need to change Google accounts, log out of the present account, clear your cache and re-start your browser.

Make sure the emails arrive

We sometimes see questions in Blogger Help Forum from people who say that they sent invitations, but the email message was never received.

The most common solution is that the author-to-be needs to check their spam folder - very often that's where the messages have gone.  If that doesn't work:
  • Try sending the person an email address from your regular email account - so you know if there's a  problem with their email.
  • Cancel the invitation (there's a link in the Invitation screen), wait a few minutes and try again.
  • Try sending an invitation to a different email address that you control, and forwarding that message (without clicking the accept link) to the person.yourself.

If none of this helps, post a question in Blogger Help Forum: tell us your blog's URL, and exactly what options you have tried.


More things to think about

As well as giving the person rights, you may also need to work with them to make sure they understand how you use certain features in Blogger:
  • What policies do you have for responding to comments - Who is notified about comments left about their posts?  What guidelines are followed about complaints?  How do you deal with spam and abuse - and what do you regard as abuse?
  • How do you organise pictures, and other external files that your blog uses?
    I always upload pictures to Picasa-web-albums outside of Blogger, LINK so I can control the picture size/resolution. If you do this, you need to make sure that your new author knows where to file their pictures.
  • Have you got a place where you keep policies, documetation, ideas for new posts, etc (eg I use a separate documentation blog for this) - does your new author need access to this?


What next?

Giving someone administrator access to your blog.


Related Articles

Understanding Google accounts

Putting AdSense ads into your posts

How to put posts into your blog's pages

Why RSS / Subscribe to Posts matters for your blog

Your blog and the so-called-social networks:  Facebook, Twitter, eg al

Putting pictures onto your blog

Advertising and your blog, some things to consider

Tuesday, 19 January 2016

Turning the RSS feed off or on again

By default, public Blogger sites offer an RSS feed.  But there may be times when you need to turn it off, either for good or temporarily.


Previously I've explained what RSS is and why it's important for bloggers.

But there may be times when you want to turn off your RSS feed, either because you don't want to offer one at all, or because you want to make some posts, or changes to existing posts that are not notified to  your RSS subscribers.

Or you may need to turn it back on again - for example, if you want to use a dynamic template, to offer a subscribe-by-email option, or to enable automatic posting to Google +.


How turn off your blog's RSS feed

  • Go to the Settings > Other tab.
  • Under "Site Feed", use the drop-down to change Allow Blog Feed to "None".  
    (This is the only option that totally turns your feed off:  the others, including Custom, leave some aspects of the feed on.)


How turn on your RSS feed

This is just the same as turning the feed off (see above), except that your need to choose one of these options instead:
  • Full - the whole post is shown in your feed
  • Until Jump Break  - only the part of the post before the jump break is sent to your feed
  • Short - only the first 120 (ish) letters, or less if the jump break comes first, are sent to your feed.

Also, the new interface has a Custom option, and the old interface has an Advanced Mode.   If you use these , you can individually set the value for post feed, comments feed (all comments), and comments-feed-per-post.


Private blogs and RSS
Blogs that are not public do not offer RSS feeds, because they cannot be secured.   So if your blog is private, then it does not matter what setting you choose, your blog will not offer an RSS feed.


Related Articles

Understanding RSS - why it's imporant for bloggers who want to grow an audience

What are dynamic templates

Linking your blog and the social networks

Follow-by-email gadget:  an easy way to offer email subscriptions

Private blogs aren't as secure as you might think