But wait, you can’t run after the creators of Microsoft to criticise or complain for stealing your data because you agreed to the Windows 10 terms and conditions, where Microsoft has clearly stated “we will access, disclose and preserve personal data.”
Now are you worried much? You are not alone. Many Windows users are unhappy with Microsoft’s choice to spy on its users and many privacy conscious users even opted to not to update to Windows 10 and stick with older version of Windows i.e. Windows 7, Windows 8 or Windows 8.1.
But now it seems like Microsoft’s goal to snoop on its users is so strong that they have now released several updates for their older versions of Windows that provides them with a capability to spy on Windows 7, 8 and 8.1 users too.
The two recent Windows updates having the identification number, KB3075249 and KB3080149, grants a capability to Windows to capture and send your data to company’s servers.
Here’s how Microsoft has described these two updates:
KB3075249 – This update adds telemetry points to the User Account Control (UAC) feature to collect information on elevations that come from low integrity levels.
KB3080149 – This package updates the Diagnostics and Telemetry tracking service to existing devices. This service provides benefits from the latest version of Windows to systems that have not yet upgraded. The update also supports applications that are subscribed to Visual Studio Application Insights.
So once both of these updates are installed on your computer then Microsoft may possibly spy on you in a similar way Microsoft Windows 10 does, and all your data will be sent to Microsoft servers.
That is not all. Privacy-conscious users of Windows have pointed out that there are numerous other updates released by Microsoft that either grant the company an access to your data or forcefully updates your existing version of Windows 7, 8 or 8.1 to the latest operating system release, Windows 10.
If you want to stick to Windows 7, 8 or 8.1 and want to remain untracked then we will recommend you to stay away from the following updates:
KB2876229 SKYPE, IF YOU WANT SKYPE THEN INSTALL IT.KB2923545 RDPKB2970228KB3035583KB2990214KB3021917KB3068708 TELEMETRYKB2592687KB2660075KB2506928KB2952664 X2KB3050265KB2726535KB2994023KB3022345 REPLACED BY KB3068708 TELEMETRYKB3022345 CAUSED FALSE SFC RESULTKB2545698 (IE9)KB3065987
If you are still using Windows 7 or Windows 8 and want to keep your data away from the access of Microsoft then we will highly recommend you to stay away from the above-mentioned updates.
But you must be curious to find out if the above updates are installed on your computer. Don’t worry, head over to the next section where we have a step by step guide to finding out whether these updates were installed on your computer, and if they are then how to uninstall them.
HOW TO SEARCH FOR SNOOPING WINDOWS UPDATES
First, we will find whether any of the above-mentioned updates is installed on your Windows 7 or Windows 8 system. To do so follow the below guide:
DISCLAIMER:
rexsniper.blogspot.com will not be held responsible for any kind of loss or damage to your system caused by the following steps. Proceed at your own risk!
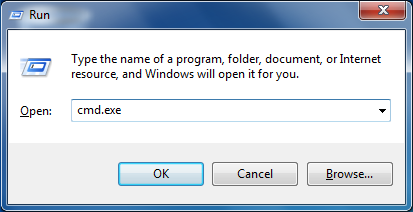
Step #1 – Launch Command Prompt using ‘Windows’ + ‘R’ keys on your keyboard.
Step #2 – In the Command Prompt box, type cmd or cmd.exe and press ‘Enter’ key on your keyboard.
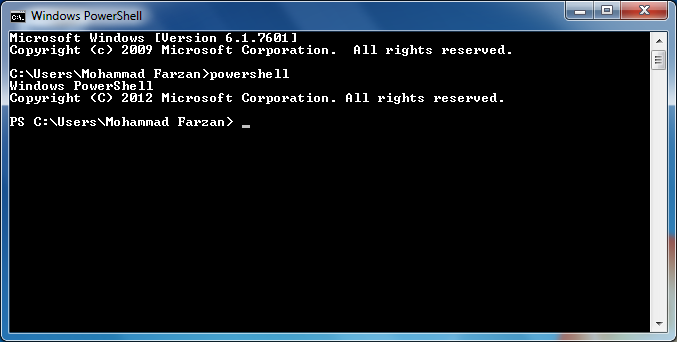
Step #3 – A new window will open. Now type PowerShell and press ‘Enter’ key to enter Windows PowerShell mode.
Now there are two methods to check whether any of the snooping updates has been installed on your system or not.
If you want to check for updates one-by-one then use Step #4a,
Else, if you want to speed up the searching processes then use Step #4b.
Step #4a – Run the following command to check for a single update. Just change the update code to search for another update.
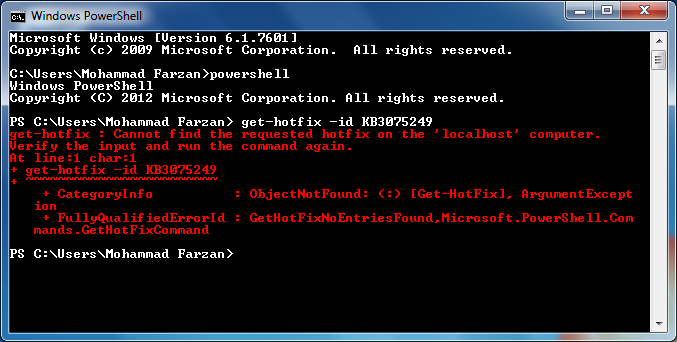
get-hotfix -id KB3075249Step #4b – Run the following command to check for multiple updates. You can separate each update with a comma and add as many update numbers that you want to check. Here is an example command to check for four updates:
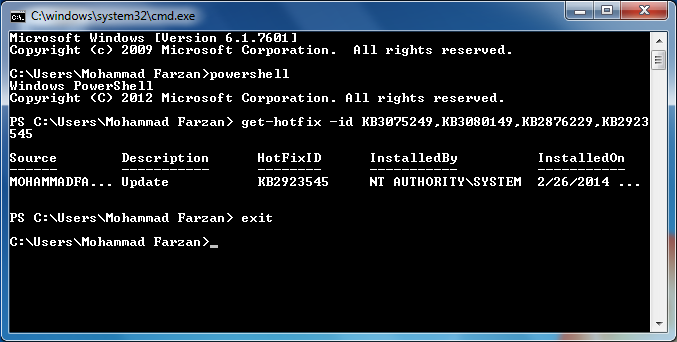
get-hotfix -id KB3075249,KB3080149,KB2876229,KB2923545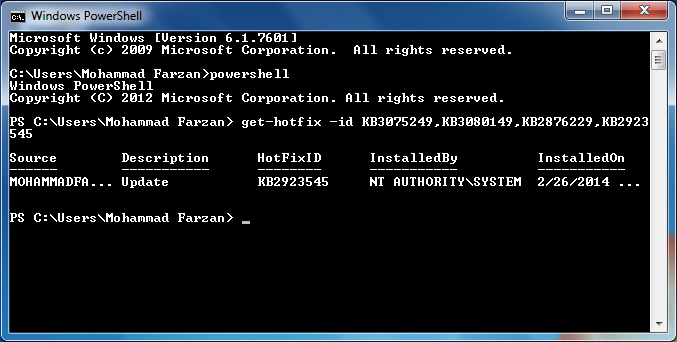
Once the above command is processed successfully and if any update is found then the command prompt will return some information about the update like its source, description, ID and installation date. As shown in the screenshot above.
And in case no update is found on the system then the command prompt will return with some errors written in a red colored text. The error message should read, “Cannot find the requested hotfix.” This shows that the searched update number is not installed on the system. As shown in the below screenshot.
Step # 5 – When you are done with the searching process, type exit and press ‘enter’key to exit from the Windows PowerShell mode.
HOW TO REMOVE/UNINSTALL SNOOPING WINDOWS UPDATES
If you want to uninstall any update from your system then use the following guide:
DISCLAIMER:
rexsniper.blogspot.com will not be held responsible for any kind of loss or damage to your system caused by the following steps. Proceed at your own risk!
Step #1 – Launch Command Prompt using ‘Windows’ + ‘R’ keys on your keyboard.
Step #2 – In the Command Prompt box, type cmd or cmd.exe and press ‘Enter’ key on your keyboard.
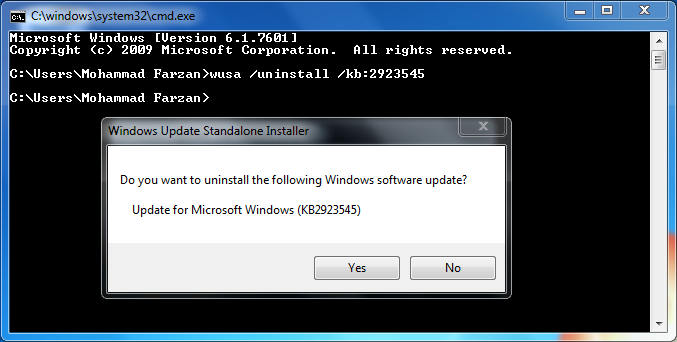
Step #3 – A new window will open. Execute the following command to uninstall any update from your system. Just change the update number you want to uninstall.
wusa /uninstall /kb:2923545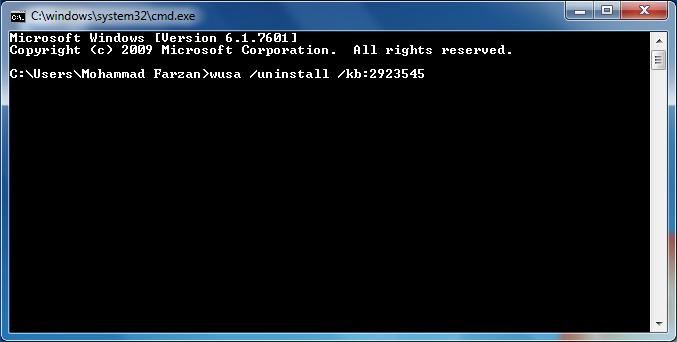
Step #4 – A new Windows Update Standalone Installer prompt will pop up, asking you if you want to uninstall the following Windows update.