Monday, 1 September 2014

The Ten-Minute-Guide to starting a blog

This article is a fast-and-furious guide to starting a blog - with a focus on getting started rather than researching to the nth degree.

Months ago, I started a properly researched article about "how to started with blogging". It's still a work in progress, and when it eventually gets finished it will have some great advice about researching blog-concepts and choosing great names.

But today I needed a quick-and-dirty version, for someone who doesn't need SEO or a fancy name. Here's what I shared with them.


How to get started with making a blog

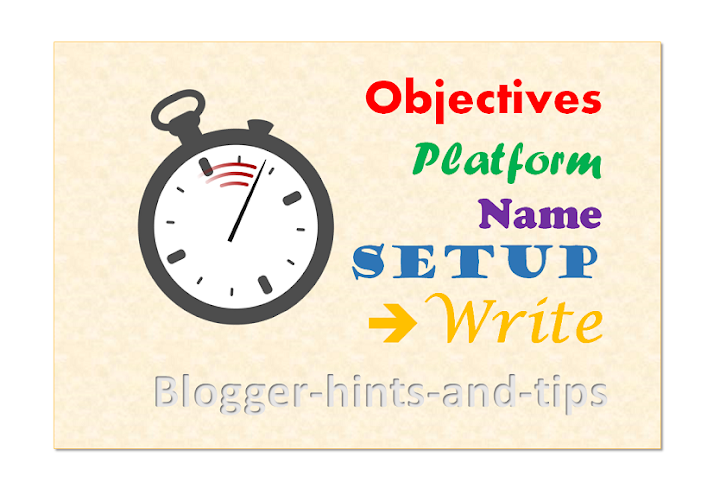
Know your objectives

Think about what you want to do, what you want to write about, and what you want to achieve from it. 

Write this down.

Be prepared to revisit these objectives every time you need to make a decision about something.  Imagine you need to choose between a girly-pink looking template or rugged-outdoors one.  Simple - just look at your objectives and see who you're writing for.

Choose a platform

There are lots of alternatives for tools that you can use. Mostly though, it boils down to Wordpress or Blogger.

Wordpress disciples will tell you that it is The Only Way, usually with a far-away look in their eyes.

Personally, I don't like zealots, and I think that Blogger is good-enough to get started with - and there are ways to change to Wordpress later on if you want to put the work into learning it.

Choose a name

Every blog needs a name. What that name is really doesn't matter that much. You just need one that you can live with: If you become wildly popular, then the rest of the world will love whatever you chose. If you don't, then it won't be due to the name you chose.

So go to the platform you chose, and start a blog with any old name that isn't taken already. Just make sure that you can remember what it is, and that you're not too embarrassed to tell your mother about it (this alone will stop you from choosing anything really stupid).

Do some basic setup

My guide to what this involves with Blogger is here.

Even if you don't use Blogger, you probably need to think about the issues covered there, especially about security vs public access.

Write

Start writing
  • Write two posts of 300+ words each.  Link them to each other: for example If post one is about crossing Australia by camel, then post two might start "When we got to Adelaide after our camel ride, we decided to try ... - and you need to put a link from the words "our camel ride" back to post one: this is called cross- linking.
  • Write another five posts. Put cross-links between them. Don't link every post to every post. But make sure that every post has 2-3 links, and that every post is linked to at least once.
  • Write five more. Cross link them to each other and the first seven.

Then go back to your objectives, think about how hard it's been to get this far, and figure out if you want to spend any more time on this hobby.   If you do - keep writing.


How to get readers

If getting other people to read your stuff is one of your objectives, then in no particular order:
  • Email a link to your mum or your dad. Ask them to visit every day, just in case you've said something new.
  • Put a link in your email signature.
  • Share your posts on Google+ (even if you just share to Public - it seems to make a difference)
  • Contribute to some forums / bulletin boards where you can put links to specific posts as part of an answer.  But I really do mean contribute. Your other content should vastly outweigh your self-links, so you aren't seen as a spammer.
  • Set up a Twitter account for the blog, and do the same thing.
  • Set up a Facebook page. Invite all your friends to like it. Every time you post to the blog, post a link to it on the FB page too.

f you think that Google+, Twitter and Facebook are a waste of time - then that's fine as far as your personal life goes. But if you want to promote a blog or website, then you simply have to get over yourself and use social media for blog promotions anyway.


How to make your blog stand out from the rest

If you've got some big objectives about having lots of readers or being famous, then you'll need to make your blog really stand out. This is a never-ending process, but here are some good first steps:
  • Stir up trouble: Be controversial or outrageous in what you write. But do be sure you have the stomach and the stamina needed: People will discover that it's your who's writing the posts, even if you try to hide it. You will get abuse, and maybe legal threats.

    Also, remember that writing 2 witty posts is easy, doing it every day / week or even month is a lot more difficult.)
  • Choose a niche, ie specific topic to write about, that no one else has written about. Or one that others have covered, but go for a different angle - eg if everyone else has described how they partied through Australia on the Oz Experience Bus, you focus on how befriended pensioners as you crawled through Queensland on the local bus, travelling only one town a day. Or something.
  • Spend some time googling possible niches before you start. But don't get caught in the trap of forever researching and never writing.
  • Read some other similar blogs, see what is successful, and do your own variation on that. Not the same thing - that's just plagiarism and you'll get caught. But something similar.
  • Use good photos or illustrations. If you don't have a picture to go with something, don't bother blogging about it.


Job Done!

That's it:   getting started with blogging in one 10-minute stream of consciousness (+ editing time :-) )

There are about 494,432,987 million similar articles on the internet, so if you need more suggestions, Google "how to make a blog", and take it from there.

Happy posting.


TL/DR

If the ten-minute guide is too much, try this 45 second one:
  • Go to http://www.blogger.com
  • Sign up if it makes you. 
  • Accept the terms and conditions. 
  • Click New Blog. 
  • Follow the prompts. 
  • Start writing.


Related Articles:

Getting started with blogger

Linking two blog posts together

Using social networks to promote a blog

Preparing a blog post in private

Use diagrams to make pictures for blog posts

Saturday, 30 August 2014

Authorship is dead? No! It must be just implemented correctly!

how to provide authorship
Last news are all about authorship is dead. Don't misunderstand this statement! After thoughtful reading of this and that article it is clear, that really dead are only some actions, which Google performs with very special authorship markup, namely
  1. data gathering and
  2. partly showing of author's image and name as byline in search results,
based on rel=author. "Partly" cause author images and names are still shown, if you are logged in into your G+ account and the author is in your G+-circles.

I will not analyze the causes of dropping the processing of rel=author - such analyze is well done in articles linked above. I want rather reassure the community, that the authorship still alive and will be so. The only question is how to correctly implement authorship. Let's look a bit into detail:
Read full article »

Thursday, 28 August 2014

C for Content: part 4 of the HASCH the OnPage SEO framework

creating relevant content

How to create relevant content

Shortly i was asked about the definitive OnPage ranking factors. My first and short answer was, there isn't the single ranking factor, but a combination of some. Then it seemed to me, this question could be very relevant verbalization of the article about website content for the part 4 of the HASCH, my OnPage SEO framework. I don't want to rob your time with commonplace phrases about "the content is king, must be unique, interesting, well-written, useful, fresh, catchy, provoking, outrageous" or the like. I will instead explain, which tangible traits must own your content to rank well. With  "to rank well" i mean, that search engine algorithm will reckon your website text as topically relevant to your chosen and used in the text keywords. Let's ask:
  • what makes content relevant?
  • how to create relevant content?
To the answers
Read full article »

Wednesday, 27 August 2014

How to Display Most Commented Posts in Blogger

One of the best gadgets for your Blogger blog is a popular posts widget for your sidebar. This lets visitors see what your trending posts are right now and encourages them to click on them to read them. This basic widget is just a little too basic, however, for the modern day website visitor. Not only do they want to see your trending posts, but they also want to join the discussions that are happening on your blog. To do that, you'll need a most commented posts widget for Blogger.

Having a customized widget on your site is a lot easier than you might think. In order to have an effective widget, however, you're going to need a few specific things to help you out.

most commented posts widget


Here's What You're Going To Get

There are certain aspects in the design of a most commented posts widget that you should expect. That's why you'll find these specific components with this custom widget:
  • Ordered by popularity. The posts that have the most comments are the most likely to have visitors want to read the post and join in with the conversation. By ordering your posts based on the popularity of them, you'll give each visitor the chance to see what the hype really is about! This lets you have a charted graphic that gives a visitor easy recognition, but also allows you to keep it straight and aligned if you're looking for a cleaner look.
  • Graphic incorporation. Blog posts that have at least one graphic incorporated with them will receive 100% more traffic than posts that have no images at all. For every graphic that you include with a blog post, the more likely you are to get a click! The same is true with your most commented posts widget, so be sure to incorporate graphics that stand out with your design.
  • Descriptions that blend in. The internet today revolves around the value that you can provide each individual user. People don't just click on things because they look visually tempting. They click on them because they promise a level of value that another website like yours isn't able to provide. By having descriptions that blend in, you'll be able to enhance the perceived value that your site can provide. This leads to more clicks!
Related: Add Multi-Colored Popular Posts to Blogger

Add the Most Commented Posts Widget to Blogger

Step 1. Log in to your Blogger account and go to Template, press the "Edit HTML" button.

Step 2. Click anywhere inside the code area and press the CTRL + F keys to open the Blogger' search box. Type the following tag inside it and hit Enter to find it:
</Group>
Step 3. Just below </Group>, add this code:
<Group description="Most Commented" selector=".most-commented">
<Variable name="most.commented.background1" description="background color1" type="color" default="#fa4242" value="#ee377a"/>
<Variable name="most.commented.background2" description="background color2" type="color" default="#ee6107" value="#fcad37"/>
<Variable name="most.commented.background3" description="background color3" type="color" default="#f0f" value="#f8e000"/>
<Variable name="most.commented.background4" description="background color4" type="color" default="#ff0" value="#c7e93d"/>
<Variable name="most.commented.background5" description="background color5" type="color" default="#0ff" value="#5ebded"/>
</Group>

add code to blogger html
Note: if you can't find the </Group> tag, try to find the following tag instead and add the variables just below it:
<b:skin><![CDATA[

Step 4. Now search for the following tag (CTRL + F):
]]></b:skin>
Step 5. And just above it, add this CSS code:
.comment-count {
    padding: 3px 10px;
    background: #fff;
    color: #000;
    font-size: 10px;
    float: right;
}

.most-commented ul {
    padding: 0px !important;
    font-family: Century Gothic, sans-serif;
}

.most-commented ul li {
    list-style-type: none;
    padding: 10px;
    color: #555;
    margin-top: -10px;
}

.most-commented ul li a {
    color: #444;
    font-weight: bold;
    text-decoration: none;
    font-size: 11px;
}

.most-commented ul li img {
    float: left;
    margin: 0px 5px 0px 0px;
    width: 60px;
    height: 60px;
}

.most-commented:nth-child(3n+0) {
    background: $(most.commented.background1);
    width: 100%;
}

.most-commented:nth-child(4n+0) {
    background: $(most.commented.background2);
    width: 95%;
}

.most-commented:nth-child(5n+0) {
    background: $(most.commented.background3);
    width: 90%;
}

.most-commented:nth-child(6n+0) {
    background: $(most.commented.background4);
    width: 85%;
}

.most-commented:nth-child(7n+0) {
    background: $(most.commented.background5);
    width: 80%;
}
Step 6. Save the template.

Now, let's add the Most Commented Posts widget to the Layout of our Blogger blog. Head over to the "Layout" section of your Blogger dashboard and click on the "Add a gadget" link on the right side. From the pop-up window, scroll down the list and select the "HTML/JavaScript" gadget:

blogger html javascript gadget

Copy and paste this script inside the content box:
<script type="text/javascript">
function stripTags(s,n) {
    return s.replace(/<.*?>/ig,"").split(/\s+/).slice(0,n-1).join(" ")
}
function mostcommented(feed) {
    var i;
    for (i = 0; i < feed.count ; i++) {
var postURL = "'" + feed.value.items[i].link + "'";
var postTitle = feed.value.items[i].title;
var postthumbnail = "<img src="+feed.value.items[i].postthumbnail+" />";
var postDescription = feed.value.items[i].postdescription;
var postComments = feed.value.items[i].commentcount;
var postList = '<div class="most-commented"><ul><li><div class="comment-count">' + postComments + "</div>" + postthumbnail + "<a href="+ postURL + '">' + postTitle + "</a>"  + '<p>' +stripTags(postDescription,10)+'...</p>' + '</li></ul></div>';
 document.write(postList);
     }
 }
 </script>
<script src="http://pipes.yahoo.com/pipes/pipe.run?
AddUrlHere=http://helplogger.blogspot.com
&NumberofPosts=5
&_id=2cb5eb603ed55a6264ee1484e5fdd45c
&_callback=mostcommented
&_render=json"
type="text/javascript"></script><span style="font-size: 80%; float:left;"><a href="http://helplogger.blogspot.com/2014/08/most-commented-posts-blogger-widget.html">Add this widget</a></span>
Here, change http://helplogger.blogspot.com with your blog URL. If you want to add more characters to the description, modify the "10" value in red from "postDescription,10".

If you want a more simple look (without the thumbnails and post snippets), add this script instead:
<script type="text/javascript">
function stripTags(s,n)
    {
    return s.replace(/<.*?>/ig,"").split(/\s+/).slice(0,n-1).join(" ")
}
function mostcommented(feed) {
 var i;
 for (i = 0; i < feed.count ; i++)
 {
var postURL = "'" + feed.value.items[i].link + "'";
var postTitle = feed.value.items[i].title;
var postComments = feed.value.items[i].commentcount;
var postList = '<div class="most-commented"><ul><li style="margin-bottom: 10px"><div class="comment-count">' + postComments + "</div>" + "<a href="+ postURL + '">' + postTitle + "</a>"  + '</li></ul></div>';
 document.write(postList);
 }
 }
 </script>
<script src="http://pipes.yahoo.com/pipes/pipe.run?
 AddUrlHere=http://helplogger.blogspot.com
&NumberofPosts=5
&_id=2cb5eb603ed55a6264ee1484e5fdd45c
&_callback=mostcommented
&_render=json"
type="text/javascript"></script>
<span style="font-size: 80%; float:left;"><a href="http://helplogger.blogspot.com/2014/08/most-commented-posts-blogger-widget.html">Add this widget</a></span>
.... and replace http://helplogger.blogspot.com with your address.
To add the "comments" text after the comments number, replace the line in red:
<div class="comment-count">' + postComments + "</div>"
with:
<div class="comment-count">' + postComments + " comments" + "</div>"
Once you have finished adding your own settings, press the "Save" button to enable the gadget in the sidebar of your blog. That's it!

configure html javascript gadget

To change the background colors of the most commented posts, go to "Template" > hit the "Customize" button and navigate to "Advanced" > "Most Commented" tab. Here you can pick 5 different colors by clicking on the color boxes:

blogger template designer

Once you've selected your favorite color scheme, click the "Apply to blog" button to save the changes... and you're done.

Why Use the Most Commented Posts widget?

The basic psychology in every human is that they want to feel like they belong to a community. That's exactly what this customized widget will bring to your site. No matter what content drew a visitor to see your content, this widget will invite them to join the lively parts of your piece of the internet. This helps to build relationships, with you and with other visitors, and this relationship-building engagement is what you need to start having real value.

Take the time to install this most commented posts widget on your site and you'll see for yourself why this is one of the most useful widgets that is available right now. Enjoy ;)

Tuesday, 26 August 2014

How Firebug Helps You Design Your Blogger Blog

For most bloggers, the idea of adjusting the coding of their blog to improve the user experience is daunting at best and often quite frightening. HTML5, CSS, and other coding elements are their own virtual language and for the average Blogger user looking to update a personal blog, the automatic settings are about as good as it gets. What if there was a better way to code a blog, whether a beginner or a pro, that could be done within the browser itself?

If you're using Firefox or Chrome, then you should also be using Firebug. It allows you to code your website in real time, so you can maximize the UX of your blog in no time at all.

You No Longer Need To Edit Through Blogger!

If you've ever tried to update a Blogger theme through the editing functions of the website, then you know how difficult it can be. You can preview your designs, but you can't save any changes to officially see what is going to happen with your site until you publish the edits. If you've missed just one line of code or forgotten one small element, you're going to have to go back into the editing matrix, find the error, update it again, and repeat until you have a responsive blog once again.

What Firebug allows you to do is see all of those elements that make up a website in real time. Instead of editing and then publishing, you can edit in real time and see updates happen, all without affecting the user experiences of visitors that are coming to your site while you're editing. You can change the fonts, colors, or virtually anything else within the design of the site quickly and see the results of your work as it happens. Don't like it? Just undo your changes.

It's really that easy.

Using Firebug to Customize CSS in Blogger

This guide will show you how to modify the CSS code of a Blogger template. Usually, the Blogger Template CSS style declarations are editable through the style.css file, found between the <b:skin> and </b:skin> tags.

To download Firebug and get more details regarding its powerful features, visit: Firebug for Firefox, or if you are using Chrome, get the Firebug Lite app. I would recommend to use Firefox, which is more complete and quick, but, nevertheless, both work the same.

Once Firebug is installed, a small bug icon will be available in the upper right of your Web browser's address bar. Clicking it, a horizontally split screen will be shown at the bottom of the browser's window. The page will continue to show in the upper half, while the lower half will show the HTML of the current web page.

firebug

To customize any web element from a Blogger template, just click either on the Firebug icon in the toolbar, or the "Inspect Element with Firebug" item in the context menu. Next, click the blue cursor button to Inspect and place the cursor right over the element to customize.

For example, let's say that we want to change the title of the "Blog Archive" gadget. After we clicked the inspect button, mouse over the "Blog Archive" title which will be highlighted as shown in the screenshot below. To change this element, click on it:

inspect element using firebug

Now that we decided which element we want to change, right click on the "Style" panel and select the "Add rule" option:

add CSS rule in firebug

This will give the class or the id of the highlighted element - in our case, the heading of the Blog Archive (#BlogArchive1 > h2). To edit this rule that we just added, click anywhere near the left curly bracket that will open a text box, so that we can type a new CSS declaration:

firebug css declaration

And here comes the fun part. Let's say that we want to make the title red. We will type color and hit Enter, then we will type the color value or the red text and hit Enter. We will also set the set the font size to 20px, text alignment to center (text-align: center) and make the text underlined (text-decoration: underline):

modify blogger css with firebug

The cool thing about Firebug is that when modifying any CSS property, you can see the results directly applied on the page. So, after adding these declarations, we'll see a big red underlined title for our Blog Archive gadget (see in the screenshot above).

To apply this CSS rule on a Blogger template, just select it beginning from the right curly bracket and to the #(id) or .(class) symbol, then right click it and Copy the CSS code.

copy firebug css rule

Before making any change, it's highly recommended to make a backup of your current template. Go to "Template" and click the "Backup/Restore" button on the upper right side. On the same "Template" location, click on the "Customize" button and navigate to "Advanced" > "Add CSS". Paste the CSS rule that you just copied into the CSS box:

add firebug css to blogger template

Click the "Apply to blog" button on the upper right corner to save the changes and view your blog.

Firebug Also Gives You One Distinct Advantage...

One of the best reasons to install Firebug into Chrome or Firefox is that it allows you to emulate some of your favorite website designs quickly and easily. Instead of hiring a web designer to do the work, which could cost you thousands, you can simply start Firebug and see what the CSS styles are for your favorite site. This allows you to create a similar widget.

From there, all you've got to do is change the coding to make the design elements work under the rules of your own custom.css. This means you can make easy design changes to your Blogger blog without having to go through all of the menus and editing functions so that your template can truly be your own. Do you have some work to do? Sure - but Firebug does all of the primary work for you.

All you've got to do is have a creative mind and a few minutes to make changes to the coding design. Whether you've been coding for years or are just starting your first blog, this is definitely the best way to make sure that your visitors have the best experience possible!